UDBDT 管理手册
文档名称:《UDBDT管理手册》
对象:DBA/运维/系统管理员
关键字列表
| 关键字 | 解释 |
|---|---|
| Udbmgr | 管理UDBDT集群的一个管理工具,可以快速部署和方法管理UDBDT 集群。 |
| UDBDT 集群 | 即UDBDT 分布式数据库,它是有多个单节点组成。 |
| 节点/UDBDT节点 | 即UDBDT分布式数据库中的单个节点。节点分三种类型:Coordinator节点,Gtmcoord节点和Datanode节点。 |
| agent | UDBDT manager通过agent进程管理UDBDT集群。 |
| hba | 允许哪些IP范围的客户端通过哪种认证方式访问指定的数据库。 |
阅读说明
本文档为通用指导文档,用户在参考的时候,对如下情况可能需要根据实际进行替换修改:
IP地址
目录名称、目录路径
用户名称
特别提醒:
在ud_sql客户端中,可以通过 \h cmd 快速获取该命令的帮助信息。
注意:应用需要连接
gtmcoord或者coord,而非udbmgr。
节点的参数设置,请参考附录:数据库参数设置中的集群版本部分。
管理UDBDT集群
本章节内容针对UDBDT集群版本。
为了方便管理UDBDT 集群,Udbmgr提供了一系列的操作命令。根据命令的功能可以划分为下面六类:
agent相关命令
host表相关命令
node表相关命令
param表相关命令
hba表相关命令
集群管理相关命令
下面分别介绍这些命令的功能和格式。
help命令
在管理UDBDT 集群的过程中,如果对某个命令的格式或者功能有任何的不明白,可以通过help命令查看该命令的功能描述和命令格式。
在ud_sql客户端只要执行“\h”命令即可查看当前Udbmgr支持的所有命令列表,如下图所示:
unvdb=# \h
Available help:
  UDBMGR PROMOTE              ALTER ITEM                  CLEAN GTMCOORD              DROP USER                   LIST PARAM                  RESET COORDINATOR           START ALL
  ADD COORDINATOR             ALTER JOB                   CLEAN MONITOR               FAILOVER DATANODE           MONITOR AGENT               RESET DATANODE              START COORDINATOR
  ADD DATANODE                ALTER USER                  CONFIG DATANODE             FAILOVER GTMCOORD           MONITOR ALL                 RESET GTMCOORD              START DATANODE
  ADD GTMCOORD                APPEND ACTIVATE COORDINATOR CREATE USER                 FLUSH HOST                  MONITOR COORDINATOR         REVOKE                      START GTMCOORD
  ADD HBA                     APPEND COORDINATOR          DEPLOY                      GRANT                       MONITOR DATANODE            REWIND DATANODE             STOP AGENT
  ADD HOST                    APPEND COORDINATOR FOR      DROP COORDINATOR            INIT ALL                    MONITOR GTMCOORD            REWIND GTMCOORD             STOP ALL
  ADD ITEM                    APPEND DATANODE             DROP DATANODE               LIST ACL                    MONITOR HA                  SET CLUSTER INIT            STOP COORDINATOR
  ADD JOB                     APPEND GTMCOORD             DROP GTMCOORD               LIST HBA                    PROMOTE DATANODE            SET COORDINATOR             STOP DATANODE
  ALTER COORDINATOR           CHECKOUT DN SLAVE STATUS    DROP HBA                    LIST HOST                   PROMOTE GTMCOORD            SET DATANODE                STOP GTMCOORD
  ALTER DATANODE              CLEAN ALL                   DROP HOST                   LIST ITEM                   REMOVE COORDINATOR          SET GTMCOORD                SWITCHOVER DATANODE
  ALTER GTMCOORD              CLEAN COORDINATOR           DROP ITEM                   LIST JOB                    REMOVE DATANODE             SHOW                        SWITCHOVER GTMCOORD
  ALTER HOST                  CLEAN DATANODE              DROP JOB                    LIST NODE                   REMOVE GTMCOORD             START AGENT
unvdb=#
也可通过在“\h”后面添加具体的命令名称,查看指定命令的功能和格式。如下面所示:
unvdb=# \h start
Command:     START AGENT
Description: start the agent process on the UDB cluster
Syntax:
START AGENT { ALL | host_name [, ...] } [ PASSWORD passwd ]

Command:     START ALL
Description: start all the nodes on the UDB cluster
Syntax:
START ALL

Command:     START COORDINATOR
Description: start the coordinator node type on the UDB cluster
Syntax:
START COORDINATOR [ MASTER | SLAVE ] ALL
START COORDINATOR { MASTER | SLAVE } node_name [, ...]

Command:     START DATANODE
Description: start the datanode node type on the UDB cluster
Syntax:
START DATANODE ALL
START DATANODE { MASTER | SLAVE } { ALL | node_name [, ...] }

Command:     START GTMCOORD
Description: start the gtmcoord node type on the UDB cluster
Syntax:
START GTMCOORD ALL
START GTMCOORD { MASTER | SLAVE } node_name

Command:     START ZONE
Description: start the nodes in the zone
 Use like this:
 START ZONE zonename

Syntax:
START ZONE zonename
下面章节的所有命令都可以通过上面的方式查看帮助信息。
agent相关命令
agent进程是Udbmgr 实现管理UDBDT 集群的关键。它是Udbmgr和UDBDT 集群之间传输命令和返回命令执行结果的中间代理。所以要实现对UDBDT 集群的管理,需要agent进程正常运行。管理agent进程的命令有Start agent, Stop agent和Monitor agent三个命令,下面对这三个命令进行介绍。
start agent
命令功能: 启动指定主机上的agent进程。指定的主机需在host表中,具体功能可通过帮助命令: \h start agent 查看。
命令格式:
START AGENT { ALL | host_name [, …] } [ PASSWORD passwd ]
命令举例:
-- 启动host表中主机上所有主机上的agent进程(主机之间没有配置互信,所有主机上用户密码都为'ud1234'):
START AGENT ALL PASSWORD 'ud1234';
-- 启动host表中主机上所有主机上的agent进程,(主机之间已经配置互信):
START AGENT ALL ;
-- 启动host表中host01,host02主机上的agent进程(主机之间没有配置互信,host01,host02上用户密码都为'ud1234'):
START AGENT host01, host02 PASSWORD 'ud1234';
-- 启动host表中host01,host02主机上的agent进程(主机之间已经配置互信):
START AGENT host01, host02 ;
stop agent
命令功能: 停止指定主机上的agent进程。指定的主机需在host表中,具体功能可通过帮助命令:\h stop agent 查看。
命令格式:
STOP AGENT { ALL | host_name [, …] }
命令举例:
-- 停止host表中所有主机上的agent进程:
STOP AGENT ALL ;
-- 停止host表中host01,host02主机上的agent进程:
STOP AGENT host01, host02 ;
monitor agent
命令功能: 查看host表中指定主机上agent进程的运行状态。Agent进程有running 和not running两种运行状态。具体功能可通过帮助命令 \h stop agent 查看。
命令格式:
MONITOR AGENT [ ALL | host_name [, …] ]
命令举例:
-- 查看host表中所有主机上的agent进程的运行状态:
MONITOR AGENT ALL ;
-- 查看host表中host01,host02主机上agent进程的运行状态:
MONITOR AGENT host01, host02 ;
host表相关命令
Host表存放主机的相关信息,而主机信息又与node节点相关,所以在添加节点之前必须添加agent到host表中,在init all集群之前,必须先start agent,而这张host表就是用来管理host和agent。管理host表的命令有add host,alter host,drop host和list host三个命令,下面对这三个命令进行介绍。
add host
命令功能: 添加新的主机到host表,参数可以选择添加,但是至少有一个,缺省参数会以默认值加入。 具体功能可通过帮助命令 \h add host 查看。
命令格式:
ADD HOST [IF NOT EXISTS] host_name ( option )

where option must be the following:

    ADDRESS = host_address,
    AGENTPORT = agent_port_number,
    UDBHOME = udb_home_path,
    PORT = port_number,
    PROTOCOL = protocol_type,
    USER = user_name
参数说明:
host_address:主机名对应的IP地址,不支持主机名。
agentport_number:agent进程监听端口号。
udb_home_path:数据库集群安装包存放路径。
host_name:主机名。
user_name:数据库集群安装用户。
protocol_type:数据库集群安装包传输使用的协议,可以为telnet,ssh。现只支持ssh。
port_number:protocol_type对用的协议的端口号,现只支持ssh,默认对应端口号22。
命令举例:
-- 添加主机名为host_name1信息:数据库安装用户tom,数据库安装包使用ssh协议传输,host_name1对应的ip为”192.168.0.10”, agent监听端口15660,安装包存放路径设置为”/home/tom/app”:
ADD HOST host_name1(USER=tom, PROTOCOL=ssh, ADDRESS='192.168.0.10', AGENTPORT=15660, udbhome='/home/tom/app');
alter host
命令功能: 修改host表中的参数,可以是一个,也可以是多个。 具体功能可通过帮助命令 \h alter host 查看。
注意: 在集群初始化后,alter host命令无法进行操作。
命令格式:
ADD HOST [IF NOT EXISTS] host_name ( option )

where option must be the following:

    ADDRESS = host_address,
    AGENTPORT = agent_port_number,
    UDBHOME = udb_home_path,
    PORT = port_number,
    PROTOCOL = protocol_type,
    USER = user_name
参数说明:
host_name:主机名。
user_name:数据库集群安装用户。
protocol_type:数据库集群安装包传输使用的协议,可以为telnet,ssh。现只支持ssh。
port_number:protocol_type对用的协议的端口号,现只支持ssh,默认对应端口号22。
agentport_number:agent进程监听端口号。
host_address:主机名对应的IP地址,不支持主机名。
udb_home_path:数据库集群安装包存放路径。
命令举例:
--修改host_name1对用的agent端口为15610:
ALTER host_name1 (AGENTPORT=15610);
--修改host_name1对用的agent端口为15610, 安装包存放路径为 /home/tom/udbtx :
ALTER host_name1 (AGENTPORT=15610, UDBHOME='/home/tom/udbtx');
drop host
命令功能: 从host表中删除指定的主机,但是主机应当没有被依赖使用,不然会报错。 具体功能可通过帮助命令 \h drop host 查看。
命令格式:
DROPHOST [ IF EXISTS ] host_name [, … ]
命令举例:
--连续删除host表中的主机名为host01和host02的成员:
DROP  HOST  host01, host02;
--删除host表中的主机名为host01的成员:
DROP  HOST  host01;
list host
命令功能: 显示host表中的成员变量,可以显示指定的主机部分参数,也可以全部显示,也可以显示host表的所有主机参数内容。
命令格式:
LIST HOST  [ ( option [, ...]) ] [ host_name [, ...] ]
where option can be one of:
    NAME
    USER
    PORT
    PROTOCOL
    AGENTPORT
    ADDRESS
    UDBHOME
参数说明:
NAME:主机名。
USER:数据库集群安装用户。
PORT:protocol_type对用的协议的端口号,现只支持ssh,默认对应端口号22。
PROTOCOL:数据库集群安装包传输使用的协议,可以为telnet,ssh。现只支持ssh。
AGENTPORT:agent进程监听端口号。
ADDRESS:主机名对应的IP地址。
UDBHOME:数据库集群安装包存放路径。
命令举例:
--显示host表中所有主机成员的信息:
LIST  host;
--显示host表中指定主机的成员信息:
LIST  host  host01;
--显示host表中指定主机的指定参数信息:
LIST  host  (user, agentport, address)  host01;
flush host
命令功能: 集群初始化后,在机器IP地址出现变更时,首先通过alter host修改host表中所有需要修改的主机名对应的IP地址,再通过flush host去更新所有数据库节点中对应的IP地址信息。
命令格式:
FLUSH HOST
命令举例:
--集群初始化后,机器IP发生变更,已完成host表中内容修改,需要刷新各个数据库节点IP地址信息:
FLUSH HOST;
flush host操作会重启slave类型的节点,因为需要修改unvdbsvr.auto.conf 中的primary_conninfo信息。
node表相关命令
Node表用于保存部署UDBDT 集群中每个节点的信息,同时包括从节点与主节点之间的同/异步关系等。管理node表的操作命令有:
add node(包含ADD GTMCOORD、ADD COORDINATOR、ADD DATANODE)
alter node(包含ALTER GTMCOORD、ALTER COORDINATOR、ALTER DATANODE)
remove node(包含REMOVE GTMCOORD、REMOVE COORDINATOR、REMOVE DATANODE)
drop node(包含DROP GTMCOORD、DROP COORDINATOR、DROP DATANODE)
list node
下面对这五个命令进行介绍
add node
命令功能: 在node表中添加节点信息。具体功能可通过帮助命令“\h add gtmcoord” 、”\h add coordinator”、”\h add datanode”查看。
注意:
Gtmcoord和datanode均可存在多个备机,nodetype为slave。第一个添加的slave节点,默认为同步slave,后续添加的默认为潜在同步,sync_state字段值为potential
指定的节点数据存放路径需要为空目录,否则执行初始化时报错。
命令格式:
ADD COORDINATOR MASTER master_name ( option )
ADD DATANODE MASTER master_name ( option )
ADD DATANODE SLAVE slave_name FOR master_name ( option )
ADD GTMCOORD MASTER master_name ( option )
ADD GTMCOORD SLAVE slave_name FOR master_name ( option )
where option must be the following:

    HOST = host_name,
    PORT = port_number,
    SYNC_STATE = sync_mode,
		PATH = ud_data
		ZONE = zone_name
		READONLY = readonly_type (仅仅在add coordinator时有效)
参数说明:
node_name:节点名称,对应node表name列。
host_name:主机名,与host表中主机名对应。
port_number:节点监听端口号。
Sync_mode:从节点与主节点的同异步关系。仅对从节点有效。值“sync”表示该从节点是同步从节点,“potential”表示该从节点是潜在同步节点,“async”表示该从节点是异步从节点。
ud_data:节点数据路径,需要保证该目录是空目录。
zone_name:节点所属的中心名字,默认是local,用在双中心场景。
readonly_type:该coordinator是否为只读节点
注意:datanode和gtmcoord类型的节点支持级联,即slave节点可以挂在slave节点之下,所以for后面可以是slave node的名字。
命令举例:
-- 添加gtmcoord master节点,主机为host01, 端口为17655,数据路径”/home/tom/udbtx/data/gc1”:
ADD GTMCOORD MASTER gc1 (HOST=host01, PORT=17655, PATH='/home/tom/udbtx/data/gc1');
-- 添加gtmcoord slave节点,主机为host02, 端口为17655,数据路径”/home/tom/udbtx/data/gc2”:
ADD GTMCOORD SLAVE gc2 for gc1 (HOST=host02, PORT=17655, SYNC_STATE='sync', PATH='/home/tom/udbtx/data/gc2');
-- 添加coordinator节点cn1信息,主机为host01,端口为17432,数据路径”/home/tom/udbtx/data/cn1”:
ADD COORDINATOR master cn1(HOST=host01, PORT=17432,PATH='/home/tom/udbtx/data/cn1');
-- 添加datanode master节点dn1_1,主机为host01,端口为19431,数据路径为”/home/tom/udbtx/data/dn1_1”:
ADD DATANODE MASTER dn1_1(HOST=host01, PORT=19431,PATH='/home/tom/udbtx/data/dn1_1');
-- 添加datanode slave节点dn1_2,主机为host02,端口为19431,数据路径为”/home/tom/udbtx/data/dn1_2”:
ADD DATANODE SLAVE dn1_2 for dn1_1(HOST=host02, PORT=19431, SYNC_STATE='sync', PATH= '/home/tom/udbtx/data/dn1_2');
-- 添加datanode slave节点dn1_2的级联slave dn1_2_2
ADD DATANODE SLAVE dn1_2_2 for dn1_2(HOST=host01, PORT=19433, SYNC_STATE='sync', PATH= '/home/tom/udbtx/data/dn1_2_2');
alter node
命令功能: 在node表中修改节点信息。具体功能可通过帮助命令“\h alter gtmcoord” 、”\h alter coordinator”、”\h alter datanode”查看。
注意: 在集群初始化前,可以通过alter node更新节点信息;在集群初始化后,只允许更新备机slave同异步关系sync_state列。
命令格式:
ALTER GTMCOORD { MASTER | SLAVE } node_name ( option )
ALTER COORDINATOR MASTER node_name ( option )
ALTER DATANODE { MASTER | SLAVE } node_name ( option )

where option can be one of:

    HOST =host_name,
    PORT = port_number,
    SYNC_STATE = sync_mode,
		PATH = ud_data
		ZONE = zone_name

参数说明:
node_name:节点名称,对应node表name列。
host_name:主机名,与host表中主机名对应。
port_number:节点监听端口号。
Sync_mode:从节点与主节点的同异步关系。仅对从节点有效。值“sync”表示该从节点是同步从节点,“potential”表示该从节点是潜在同步节点,“async”表示该从节点是异步从节点。
ud_data:节点数据路径,需要保证该目录是空目录。
zone_name:节点所属的中心名字,默认是local,用在双中心场景。
命令举例:
-- 集群初始化前,更新gtmcoord master端口号为16666:
ALTER GTMCOORD MASTER gc1 (PORT=16666);
-- 更新gtmcoord slave与gtmcoord master为同步关系:
ALTER GTMCOORD SLAVE gc2 (SYNC_STATE='sync');
-- 更新gtmcoord extra与gtmcoord master为异步关系:
ALTER GTMCOORD SLAVE gcs (SYNC_STATE='async');
-- 集群初始化前,更新coordinator cn1端口为15532,数据路径为”/home/tom/udbtx/data/cn1”:
ALTER COORDINATOR master cn1 (PORT=15532, PATH='/home/tom/udbtx/data/cn1');
-- 集群初始化前,更新datanode master dn1_1主机为host05,数据路径为”/home/tom/udbtx/data/dn1_1”:
ALTER DATANODE MASTER dn1_1 (HOST=host05, PATH='/home/tom/udbtx/data/dn1_1');
-- 更新datanode slave dn1_2与主机datanode master为同步关系:
ALTER DATANODE SLAVE dn1_2 (SYNC_STATE='sync');
-- 更新datanode extra dn1s与主机datanode master为异步关系:
ALTER DATANODE SLAVE dn1s (SYNC_STATE='async');
remove node
命令功能:
在node表中修改节点的initialized和字段值为false,并从uddt_node表中删除node,但在mgr的node表中保留信息。
注意:
目前只能remove coordiantor和datanode slave、gtmcoord slave,且要求节点处于not running 状态。
命令格式:
REMOVE COORDINATOR MASTER node_name
REMOVE DATANODE SLAVE node_name
REMOVE GTMCOORD SLAVE node_name
命令举例
-- 从集群中删除coordinator节点
remove coordinator master cn1;
-- 从集群中删除datanode slave节点
remove datanode slave dn1_2;
-- 从集群中删除gtmcoord slave节点
remove datanode slave gc2;
drop node
命令功能: 在node表中删除节点信息。具体功能可通过帮助命令“\h drop gtmcoord” 、”\h drop coordinator”、”\h drop datanode”查看。
注意: 在集群初始化前,可以通过drop node删除节点信息,但是在存在备机的情况下,不允许删除对应的主机节点信息;在集群初始化后,不允许drop node操作。
命令格式:
DROP GTMCOORD { MASTER | SLAVE } node_name
DROP COORDINATOR MASTER node_name [, ...]
DROP DATANODE { MASTER | SLAVE } node_name [, ...]
DROP ZONE zonename # 删除同一个zone的所有节点
命令举例:
-- 在集群初始化之前删除datanode slave dn1_2:
DROP DATANODE SLAVE dn1_2;
-- 在集群初始化之前删除coordinator cn1:
DROP COORDINATOR master cn1;
-- 在集群初始化之前删除gtmcoord slave gc2:
DROP GTMCOORD SLAVE gc2;
-- 在集群初始化之前删除gtmcoord master gc1:
DROP GTMCOORD MASTER gc1;
list node
命令功能: 显示node表中节点信息。具体功能可通过帮助命令“\h list node” 查看。
命令格式:
LIST NODE COORDINATOR [ MASTER | SLAVE ]
LIST NODE DATANODE [ MASTER | SLAVE ]
LIST NODE DATANODE MASTER node_name
LIST NODE HOST host_name [, ...]
LIST NODE  [ ( option ) ] [ node_name [, ...] ]
LIST NODE ZONE zonename
where option can be one of:

    NAME
    HOST
    TYPE
    MASTERNAME
    PORT
    SYNC_STATE
    PATH
    INITIALIZED
    INCLUSTER

参数说明:
NAME:节点名称,对应node表name列。
HOST:主机名,与host表中主机名对应。
TYPE:节点类型,包含:GTMCOORD MASTER, GTMCOORD SLAVE,COORDINATOR MASTER,DATANODE 	MASTER,DATANODE SLAVE
MASTERNAME:备机对应的主机名,非备机对应为空。
PORT:节点监听端口号。
sync_state:从节点与主节点的同异步关系。仅对从节点有效。值“sync”表示该从节点是同步从节点,“potential”表示该从节点是潜在同步节点,“async”表示该从节点是异步从节点。
PATH:节点数据路径,需要保证该目录是空目录。
INITIALIZED:标识节点是否初始化。
INCLUSTER:标识节点是否在集群中。
命令举例:
-- 显示node表节点信息:
LIST NODE;
-- 显示节点名称为”dn1_1”的节点信息:
LIST NODE dn1_1;
-- 显示dn1_1的master/slave节点信息:
list node datanode master dn1_1;
-- 显示主机localhost1上的节点信息:
list node host host01;
param表相关命令
param表用于管理存放UDBDT集群中所有节点的unvdbsvr.conf文件中的参数,当参数某个被修改后,该参数就会被添加到此表中,用来标识。对于修改配置参数的查询,可以通过list param命令。
set param
命令功能: 更改unvdbsvr.conf节点配置文件中的参数,如果该参数有效,则系统内部会执行相关的操作,使更改生效,此操作只适用于那些不需要重启集群的参数类型(如sighup, user, superuser),而对于修改其它类型的参数,则会给出相应的提示。 如果在命令尾部加force,则不会检查参数的有效性,而强制写入文件中,系统不执行任何操作,只起到记录作用;
命令格式:
SET COORDINATOR [ MASTER | SLAVE ] ALL ( { parameter = value } [, ...] ) [ FORCE ]
SET COORDINATOR { MASTER | SLAVE} node_name ( { parameter = value } [, ...] ) [ FORCE ]
SET DATANODE [ MASTER | SLAVE ] ALL ( { parameter = value } [, ...] ) [ FORCE ]
SET DATANODE { MASTER | SLAVE } node_name ( { parameter = value } [, ...] ) [ FORCE ]
SET GTMCOORD ALL ( { parameter = value } [, ...] ) [ FORCE ]
SET GTMCOORD { MASTER | SLAVE } node_name ( { parameter = value } [, ...] ) [ FORCE ]
命令举例:
-- 修改cn1上的死锁时间
SET  COORDINATOR  MASTER cn1(deadlock_timeout = '1000ms');
-- 修改所有的datanode上配置文件中的checkpoint_timeout的参数
SET  DATANODE  all(checkpoint_timeout = '1000s');
-- 修改所有的datanode上配置文件中的一个不存在的参数
SET  DATANODE  all(checkpoint = '10s')  FORCE;
reset param
命令功能: 把unvdbsvr.conf文件中的参数变为默认值。
命令格式:
RESET COORDINATOR [ MASTER | SLAVE ] ALL ( parameter [, ...] ) [ FORCE ]
RESET COORDINATOR { MASTER | SLAVE } node_name ( parameter [, ...] ) [ FORCE ]
RESET DATANODE [ MASTER | SLAVE ] ALL ( parameter [, ...] ) [ FORCE ]
RESET DATANODE { MASTER | SLAVE } node_name ( parameter [, ...] ) [ FORCE ]
RESET GTMCOORD ALL ( parameter [, ...] ) [ FORCE ]
RESET GTMCOORD { MASTER | SLAVE } node_name ( parameter [, ...] ) [ FORCE ]
命令举例:
-- 把datanode master dn1_1的配置参数checkpoint_timeout变为默认值。其中查询结果中的*号是适配符,表示所有满足条件的节点名。
RESET  DATANODE  MASTER  dn1_1 (checkpoint_timeout);
-- 把datanode中所有的配置参数checkpoint_timeout变为默认值
RESET  DATANODE  all (checkpoint_timeout);
list param
命令功能: 查询节点的unvdbsvr.conf配置文件中修改过的参数列表。
命令格式:
LIST PARAM
LIST PARAM node_type node_name [ sub_like_string ]
LIST PARAM cluster_type ALL [ sub_like_string ]

where node_type can be one of:

    GTMCOORD MASTER
    GTMCOORD SLAVE
    COORDINATOR MASTER
    COORDINATOR SLAVE
    DATANODE MASTER
    DATANODE SLAVE

where cluster_type can be one of:

    GTMCOORD
    COORDINATOR
    DATANODE
    DATANODE MASTER
    DATANODE SLAVE
命令举例:
--查询节点类型为datanode master ,节点名为dn1_1配置文件中修改后的参数
LIST  param  DATANODE  MASTER  dn1_1;
--查询节点类型为coordinator的所有节点中配置文件中修改后的参数
LIST  param  COORDINATOR  all;
show
命令功能: 显示配置文件中的参数信息,支持模糊查询。
命令格式:
SHOW PARAM node_name parameter
命令举例:
-- 模糊查询节点dn1_1的配置文件中有wal的参数
  show param dn1_1  wal;
-- 查询节点dn1_1的配置文件中checkponit_timeout的参数的内容
  show param dn1_1  checkpoint_timeout;
hba表相关命令
hba表用于管理存放UDBDT集群中所有coordiantor节点的ud_hba.conf文件中的配置项,当配置项被添加后,就会记录到此表中,用来标识。对于添加过的配置项,可以通过list hba命令显示。
add hba
命令功能: 添加新的hba配置到coordinator中。通过 \h add hba 获取帮助信息。
命令格式:
Syntax:
ADD HBA GTMCOORD { ALL | nodename } ( "hba_value" )
ADD HBA COORDINATOR { ALL | nodename } ( "hba_value" )
ADD HBA DATANODE { ALL | nodename } ( "hba_value" )

where hba_value must be the following:

    host database user IP-address IP-mask auth-method
命令举例:
-- 在coordinator的hba中添加 10.0.0.0 IP端的所有用户通过md5认证访问所有数据库的配置:
add hba coordinator all ("host all all 10.0.0.0 8 md5");
list hba
命令功能: 显示通过add hba添加的配置项。
命令格式:
LIST HBA [ coord_name [, …] ]
命令举例:
	unvdb=# list hba;
 nodename |          hbavalue
----------+-----------------------------
 cn1   | host all all 10.0.0.0 8 md5
 cn2   | host all all 10.0.0.0 8 md5
(2 rows)
drop hba
命令功能: 删除通过add hba添加的配置项。
命令格式:
Syntax:
DROP HBA GTMCOORD { ALL | nodename } ( "hba_value" )
DROP HBA COORDINATOR { ALL | nodename } ( "hba_value" )
DROP HBA DATANODE { ALL | nodename } ( "hba_value" )

where hba_value must be the following:

    host database user IP-address IP-mask auth-method
命令举例:
-- 在coordinator的hba中删除 10.0.0.0 IP端的所有用户通过md5认证访问所有数据库的配置:
drop coordinator hba all ("host all all 10.0.0.0 8 trust");
show hba
命令功能:
显示节点
ud_hba.conf中的hba信息。
命令格式:
Description: show the content of the ud_hba.conf file
Syntax:
SHOW HBA { ALL | node_name }
命令举例:
-- 显示节点cn1的hba信息
show hba cn1;
  nodetype   | nodename |                 hbavalue
-------------+----------+------------------------------------------
 coordinator | cn1      | local all all trust                     +
             |          | host all all 127.0.0.1 32 trust         +
             |          | host all all ::1 128 trust              +
             |          | local replication all trust             +
             |          | host replication all 127.0.0.1 32 trust +
             |          | host replication all ::1 128 trust      +
             |          | host all all 192.168.0.211 32 trust      +
             |          | host all all 192.168.0.91 32 trust      +
             |          | host all all 10.0.0.0 8 trust           +
与
list hba不同的是,list仅仅显示通过add hba添加的hba信息,而show hba显示具体节点中ud_hba.conf文件的内容。
节点管理相关命令
对UDBDT集群的节点管理主要包括启停、监控,初始化和清空等各种操作,对应的操作命令为start,stop,monitor,init和clean命令。下面对这些命令的功能和使用方法进行详细的解释。
init all
命令功能: 初始化整个UDBDT集群。Udbmgr 不提供单个节点初始化的命令,只提供对整个集群进行初始化的命令。通过往host表,node表中添加UDB集群所需要的host和node信息,只需要执行init all命令即可初始化并启动整个集群。具体功能可通过帮助命令 \h init all 查看。如果用户要使用rewind功能,需要在init all命令后加上data_checksums
命令格式:
INIT ALL
命令举例:
-- 配置host表和node表后,初始化整个集群:
  INIT ALL;
monitor
命令功能: 查看UDBDT 集群中指定节点名字或者指定节点类型的运行状态。Monitor命令的返回值共有三种: Running:指节点正在运行且接受新的连接; Not running:指节点不在运行; Server is alive but rejecting connections:指节点正在运行但是拒绝新的连接。 具体功能可通过帮助命令 \h monitor 查看。
命令格式:
MONITOR [ ALL ]
MONITOR GTMCOORD [ ALL ]
MONITOR GTMCOORD { MASTER | SLAVE } [ ALL | node_name ]
MONITOR COORDINATOR { MASTER | SLAVE } [ ALL | node_name [, ...] ]
MONITOR DATANODE [ ALL ]
MONITOR DATANODE { MASTER | SLAVE } [ ALL | node_name [, ...] ]
MONITOR AGENT [ ALL | host_name [, ...] ]
MONITOR HA
MONITOR HA [ ( option ) ] [ node_name [, ...] ]
MONITOR HA ZONE zonename
MONITOR ZONE zonename
命令举例:
-- 查看当前UDB集群中所有节点的运行状态:
MONITOR ALL;
-- 查看当前集群中所有coordinator节点的运行状态:
MONITOR COORDINATOR ALL;
-- 查看当前集群中节点类型为datanode master,节点名字为dn1_1和dn2_1的运行状态:
MONITOR DATANODE MASTER dn1_1,dn2_1;
-- 查看集群agent状态:
MONITOR agent ;
-- 查看集群流复制状态:
MONITOR ha;
start
命令功能: 启动指定的节点名字的集群节点,或者启动指定节点类型的所有集群节点。具体功能可通过帮助命令 \h start 查看。
命令格式:
START ALL
START AGENT { ALL | host_name [, ...] } [ PASSWORD passwd ]
START GTMCOORD ALL
START GTMCOORD { MASTER | SLAVE } node_name
START COORDINATOR [ MASTER | SLAVE ] ALL
START COORDINATOR { MASTER | SLAVE } node_name [, ...]
START DATANODE ALL
START DATANODE { MASTER | SLAVE } { ALL | node_name [, ...] }
START ZONE zonename
命令举例:
-- 启动集群中所有节点:
START ALL;
-- 启动gtmcoord master节点:
START GTMCOORD MASTER gc1;
-- 启动当前集群中节点类型为datanode master,名字为dn1_1和dn2_1的节点:
START DATANODE MASTER dn1_1,dn2_1;
-- 启动集群主机上的agent:
START AGENT all;
stop
命令功能: 此命令与start命令相反,停止指定名字的节点,或者停止指定节点类型的所有集群节点。 Stop命令如果没有指定MODE,默认使用smart模式。 Stop 模式有三种:smart ,fast和immediate。
Smart:拒绝新的连接,一直等老连接执行结束。
Fast:拒绝新的连接,断开老的连接,是比较安全的停止节点的模式。
Immediate:所有数据库连接被中断,用于紧急情况下停止节点。
具体功能可通过帮助命令“\h stop” 查看。
命令格式:
STOP ALL [ stop_mode ]
STOP AGENT { ALL | host_name [, ...] }
STOP COORDINATOR [ MASTER | SLAVE ] ALL [ stop_mode ]
STOP COORDINATOR { MASTER | SLAVE } { node_name [, ...] } [ stop_mode ]
STOP DATANODE ALL [ stop_mode ]
STOP DATANODE { MASTER | SLAVE } { ALL | node_name [, ...] } [ stop_mode ]
STOP GTMCOORD ALL [ stop_mode ]
STOP GTMCOORD { MASTER | SLAVE } node_name [ stop_mode ]
STOP ZONE zonename [ stop_mode ]
where stop_mode can be one of:

    MODE SMART     | MODE S
    MODE FAST      | MODE F
    MODE IMMEDIATE | MODE I
命令举例:
-- 使用fast模式停止集群中所有节点:
STOP ALL MODE FAST;
-- 使用immediate模式停止所有coordinator节点:
STOP COORDINATOR ALL MODE IMMEDIATE;
-- 使用smart模式停止当前集群中节点类型为datanode master,名字为dn1_1和dn2_1的节点:
STOP DATANODE MASTER dn1_1,dn2_1; 或者
STOP DATANODE MASTER dn1_1,dn2_1; MODE SMART;
-- 停止集群主机上的agent:
STOP AGENT all;
append
命令功能: Append命令用于向UDBDT集群中追加集群节点,用于集群扩容。Gtmcoord master是集群中的核心,append命令不包括追加gtmcoord master命令。 执行append命令以前需要执行下面操作步骤(假设append coordinator到一台新机器上):
1.把这台新机器的host信息添加到host表中。
2.把要追加的coordinator信息添加到node表中。
3.在新机器上创建用户及其密码。
4.执行deploy 命令把集群可执行文件分发到新机器上。
5.在新机器上修改当前用户下隐藏文件
.bashrc,追加如下内容并执行source ~/.bashrc使其生效:
export UDBHOME=/home/tom/udbtx (根据实际情况修改)
export PATH=$UDBHOME/bin:$PATH
export LD_LIBRARY_PATH=$UDBHOME/lib:$LD_LIBRARY_PATH
6.执行start agent,启动新机器上的agent 进程。
7.执行append命令。 具体功能可通过帮助命令 \h append 查看。
命令格式:
APPEND GTMCOORD SLAVE node_name
APPEND DATANODE { MASTER | SLAVE } node_name
APPEND COORDINATOR MASTER node_name

-- 利用流复制功能加快append coordinator
APPEND COORDINATOR dest_coordinator_name FOR source_coordinator_name
APPEND ACTIVATE COORDINATOR node_name
命令举例:
-- 往UDBDT集群中追加一个名为cn4的coordinator节点:
APPEND COORDINATOR master cn4;
-- 往UDBDT集群中追加一个名为dn4_1的datanode master节点:
APPEND DATANODE MASTER dn4_1;
-- 为UDBDT集群中追加一个名为dn4_2的datanode slave节点:
APPEND DATANODE SLAVE dn4_2;
-- 利用流复制功能往UDBDT集群中追加coordinator master 节点:
APPEND COORDINATOR cn5 FOR cn1;
APPEND ACTIVATE COORDINATOR cn5;
failover
命令功能: 当集群中的gtmcoord/datanode master主节点出现问题的时候,可以通过此命令把备节点主机切换过来,保证集群的稳定性。
在主机存在问题等情况下,为保障服务的可持续性,可以通过failover命令操作将备机升为主机。具体功能可通过帮助命令 \h failover gtmcoord 、 \h failover datanode 查看。
注意:
failover命令不加”FORCE”则只允许备机为同步备机且运行正常才能升为master,否则报错;Failover命令加”FORCE”备机运行正常即可升为master。
Failover命令通过节点信息验证sync_state列的值,选择其中的同步备机升为master,如无同步备机,使用force选项,则会选择xlog位置离master最近的异步备机提升为主。
如果通过加”FORCE”命令强制将异步备机升为主机,可能存在数据丢失风险。
命令格式:
FAILOVER GTMCOORD node_name [ FORCE ]
FAILOVER DATANODE node_name [ FORCE ]
参数说明:
node_name:
节点名称,对应node表name列。
命令举例:
-- 将gtmcoord master的同步备机升为主机:
FAILOVER GTMCOORD  gc1;
-- 将gc1运行正常的异步备机强制升为主机:
FAILOVER GTMCOORD gc1 FORCE;
-- 将datanode master dn1_1的同步备机升为主机:
FAILOVER DATANODE dn1_1;
-- 将运行正常的异步备机强制升为主机:
FAILOVER DATANODE  dn1_1 FORCE;
switchover
命令功能:主备机之间做切换,原来的备机升为主,原来的主机降为备机,从跟随到新的主机上。切换的时候会检测主备之间的xlog位置是否一致,如果一致,则进行切换,不一致,则不进行切换。如果需要进行强制切换,则需要添加force 关键字。
如果通过加”FORCE”命令强制进行主备切换,可能存在数据丢失风险。
命令格式
Command:     SWITCHOVER DATANODE
Description: datanode master, datanode slave switchover, the original master changes to slave and the original slave changes to master
Syntax:
SWITCHOVER DATANODE SLAVE datanode_name

Command:     SWITCHOVER GTMCOORD
Description: gtmcoord master, gtmcoord slave switchover, the original master changes to slave and the original slave changes to master
Syntax:
SWITCHOVER GTMCOORD SLAVE gtmcoord_name
命令举例:
-- datanode master dn1_1 与slave dn1_2 交换角色
switchover datanode slave dn1_2;
-- datanode master dn1_2 与slave dn1_1
switchover datanode slave dn1_1 force;
clean
命令功能: Clean 命令用于清空UDBDT 集群中节点数据目录下面的所有数据。执行此命令的前提是所有节点都处在stop 状态。执行clean命令不会有交互,所以如果需要保留数据,请慎重执行这个命令。 具体功能可通过帮助命令 \h clean 查看。
命令格式:
CLEAN ALL
CLEAN COORDINATOR { MASTER | SLAVE } { node_name [ , ... ] }
CLEAN DATANODE { MASTER | SLAVE } { node_name [ , ... ] }
CLEAN GTMCOORD { MASTER | SLAVE } node_name
CLEAN MONITOR number_days
CLEAN ZONE zonename
命令举例:
-- 清空UDBDT 集群中所有节点数据目录下的内容(UDB 集群处在stop状态):
CLEAN ALL;
-- 清空coordinator节点数据目录:
CLEAN COORDINATOR MASTER cn1;
-- 清空15天前的monitor数据:
CLEAN MONITOR 15;
deploy
命令功能: Deploy 命令用于把Udbmgr所在机器编译的UDBDT 集群的可执行文件向指定主机的指定目录上分发。常用于在刚开始部署UDBDT集群或者UDBDT 集群源码有改动,需要重新编译时。 具体功能可通过帮助命令 \h deploy 查看。
命令格式:
DEPLOY { ALL | host_name [, …] } [ PASSWORD passwd ]
命令举例:
-- 把可执行文件分发到所有主机上(host 表上所有主机),主机之间没有配置互信,密码都是“jy21JY23”:
DEPLOY ALL PASSWORD 'jy21JY23';
-- 把可执行文件分发到所有主机上(host 表上所有主机),主机之间已经配置互信:
DEPLOY ALL;
-- 把可执行文件分发到host01和host02主机上,两主机都没有配置互信,密码都是'jy21JY23':
DEPLOY host01,host02 PASSWORD 'jy21JY23';
-- 把可执行文件分发到host01和host02主机上,两主机都已经配置互信:
DEPLOY host01,host02;
udbmgr promote
命令功能: 在NODE表中更改指定名称的节点对应的状态为master,删除该节点对应的master信息;同时在PARAM表中更新该节点对应的参数信息。该命令主要用在执行FAILOVER出错后续分步处理中。具体功能可通过帮助命令“\h udbmgr promote” 查看。
命令格式:
UDBMGR PROMOTE { GTMCOORD | DATANODE } SLAVE node_name
命令举例:
-- 更新udbmgr端node表及param表中datanode slave datanode1状态为master:
UDBMGR PROMOTE DATANODE SLAVE datanode1;
promote
命令功能: 对节点执行PROMOTE操作,将备机的只读状态更改为读写状态,通过SELECT PG_IS_IN_RECOVERY()查看为f结果。该命令主要用在执行FAILOVER出错后续分步处理中。具体功能可通过帮助命令“\h promote gtmcoord” 或者 “\h promote datanode”查看。
命令格式:
PROMOTE DATANODE { MASTER | SLAVE } { node_name }
PROMOTE GTMCOORD { MASTER | SLAVE } { node_name }
命令举例:
-- 将datanode slave datanode1提升为读写状态:
PROMOTE DATANODE SLAVE datanode1;
-- 将gtmcoord slave gc1提升为读写状态:
PROMOTE GTMCOORD SLAVE gc1;
rewind
命令功能: 对GTMCOORD或者DATANODE备机执行rewind操作,使其重建备机与主机的对应关系。
命令格式:
REWIND DATANODE SLAVE { node_name }
REWIND GTMCOORD SLAVE { node_name }
命令举例:
-- 重建备机datanode slave datanode1与master的关系:
REWIND DATANODE SLAVE datanode1;
-- 重建备机gtmcoord slave gc1与master的关系:
REWIND GTMCOORD SLAVE gc1;
zone
命令功能:
zone init初始化副中心的节点,执行此命令的前提是主中心的所有节点都已经init。
zone switchover用户主备中心切换,即副中心升级为主中心,节点升级为master节点,主中心的节点降为备机,用户主备中心临时切换的场景,后面还可以切换回来;
zone failover备中心升级为主中心,原主中心节点则不再工作,用于主中心down且不可恢复,副中心需要代替主中心工作的场景。
命令格式:
ZONE INIT zone_name              						#初始化副中心的所有节点
ZONE SWITCHOVER zonename [FORCE] [maxTrys]  #主备中心互换
ZONE FAILOVER zonename [ FORCE ]   					#备中心升级为主中心
命令举例:
zone init zone2;
zone switchover zone2 force 30;
zone failover zone2;
License管理相关命令
命令功能:
获取集群所有机器的机器码,部署license,查看当前集群授权状态等操作
命令格式:
license get_machine_info            #获取集群所有机器的机器码,用于生成License
license deploy  'license code'      #部署license
license check   	                #查看当前集群授权状态
命令举例:
license get_machine_info;
license deploy 'UDB-DT-LICENSE1.0dybbUOwL5KD4oUbgEq8mJMhsOxQFXmqOerJMH1t8vw0ncSQpNF7xUjx2S3OwEqNKwZpEv1Kiqmy+Bw//IuAbp/ghyV0ceEnzRAeqjjat+dJxaotXNozLhagnly2BGkVy';
license check;
参数优化相关命令
命令功能:
根据当前集群机器配置情况,推荐参数配置值。
命令格式:
recommend param show '负载类型' '参数名称'; #负载类型分为:TP、AP、HTAP
命令举例:
recommend param show 'tp' ALL;      #显示负载类型为TP时,所有参数的推荐值
recommend param show 'ap' 'max_connections';      #显示某个参数的推荐值
命令功能:
根据当前集群机器配置情况,按推荐值修改参数配置。
命令格式:
recommend param set '负载类型' '参数名称'; #负载类型分为:TP、AP、HTAP
命令举例:
recommend param set 'tp' ALL;      #按负载类型为TP,设置所有参数为推荐值
recommend param show 'ap' 'max_connections';      #设置某个参数为推荐值
特色功能
默认的分片方式
UDBDT支持四种默认分片方式:
hash:哈希分布
replication:复制表,在每个datanode上都保留完整的数据;
modulo:取模分片
random:随机分片方式
辅助索引
非分片键KV查询时,由于CN节点无法精准确定涉及节点,故而全节点下发查询,导致无关节点资源浪费,可能引起CPU飙升等问题。
通过查询辅助表确定该查询涉及的节点,完成本次查询的精确下发,从而提高查询效率。
语法
命令格式:
CREATE [UNLOGGED] ADDITIONAL TABLE [ IF NOT EXISTS ] [additional_table_name]
ON table_name ( column_name )
[ with_index_options ]
[ TABLESPACE tablespace_name ]
[ DISTRIBUTE BY XXX ]
[ TO NODE (node_name [, ...] ) | TO GROUP uddtgroup_name ]
with_index_options:
WITH INDEX [ CONCURRENTLY ] [ name ] [ USING method ]
[ WITH ( storage_parameter = value [, ... ] ) ]
[ TABLESPACE tablespace_name ]
说明:
ADDITIONAL 为辅助表关键字;
additional_table_name 为辅助表表名,可选,若不指定则按照:主表名+辅助字段名+tbl 命名;
table_name 为主表表名,必选;
column_name 为主表字段名(需要建辅助表的字段),必选;
with_index_options 辅助表索引信息,指定时按照指定语法创建索引。未指定时,则按照默认参数创建索引;(辅助表的column_name字段必然创建索引。默认时,索引方法默认btree,命名空间与辅助表 保持一致。)
tablespace_name 辅助表命名空间,可选。未指定时,与主表保持一致;
DISTRIBUTE BY XXX 辅助表分片方式,可选。未指定时,与主表保持一致;
TO NODE (node_name [, …] ) | TO GROUP uddtgroup_name 辅助表分片节点,可选。未指定时,与主表保持一致。
举例:
unvdb=# create table tt(c1 int, c2 int, c3 text);
CREATE TABLE
unvdb=# create additional table aux on tt(c2);
CREATE ADDITIONAL TABLE
效果:
创建辅助表前,需要去两个datanode上遍历数据:
unvdb=# explain verbose select * from tt where c2 = 800;
                                    QUERY PLAN
-----------------------------------------------------------------------------------
 Cluster Gather  (cost=1000.00..73772.86 rows=4 width=41)
   Remote node: 16385,16386
   ->  Gather  (cost=1000.00..73771.66 rows=2 width=41)
         Output: c1, c2, c3
         Workers Planned: 2
         ->  Parallel Seq Scan on public.tt  (cost=0.00..72771.46 rows=1 width=41)
               Output: c1, c2, c3
               Filter: (tt.c2 = 800)
               Remote node: 16385,16386
(9 rows)
unvdb=#  select * from tt where c2 = 800;
 c1  | c2  |                c3
-----+-----+----------------------------------
 800 | 800 | 8aa8d286-fa30-444e-a394-045ce33a4197
(1 row)

Time: 541.606 ms
创建辅助表之后,只需要去一个datanode上找数据,且根据tid获取数据:
unvdb=#  explain verbose select * from tt where c2 = 800;
                           QUERY PLAN
----------------------------------------------------------------
 Cluster Gather  (cost=0.00..4.32 rows=1 width=41)
   Remote node: 16385
   ->  Tid Scan on public.tt  (cost=0.00..4.02 rows=1 width=41)
         Output: c1, c2, c3
         TID Cond: (tt.ctid = '(3,39)'::tid)
         Filter: (tt.c2 = 800)
         Remote node: 16385
(7 rows)
unvdb=# select * from tt where c2 = 800;
 c1  | c2  |                c3
-----+-----+----------------------------------
 800 | 800 | 8aa8d286-fa30-444e-a394-045ce33a4197
(1 row)
Time: 3.449 ms
辅助索引使用限制
只针对分片表的非分片键构建辅助表,复制表、本地表、临时表不需要;
只针对单表的非分片键等值查询,非等值查询,多表关联无法使用辅助索引表。
分片
分片目的
解决数据库扩展性问题,突破单节点数据库服务器的 I/O 能力限制。
分片后引入的问题
跨节点join问题
只要是进行切分,跨节点Join导致的数据重分布问题是不可避免的。但是良好的设计和切分可以减少此类情况的发生。
解决这一问题,要求分片字段和join连接字段保持一致,当查询可以下推至节点运算时,可以有效解决此类问题。
如果运算不允许下推至数据节点,可以将数据量较小的表修改为复制表后(数据量不超过1000万),也能实现本节点运算的能力。
分片策略
1000万以内的表,不建议分片. 通过合适的索引,可以更好地解决性能问题。
分片键的value不能update
分片键选择时,尽量保证数据能够均匀分布。
分片键选择时,尽量保证事务控制在分片范围内(本节点),避免出现跨分片(跨节点)。
继承表的分片键,子表保持和父表一致。
总体上来说,分片键的选择是取决于最频繁的查询 SQL 的条件。找出每个表最频繁的 SQL,分析其查询条件,以及相互的关系,就能比较准确的选择每个表的分片策略。
关联查询多的场景分片策略
准备环境
unvdb=# create table a1 (id int,id1 int) distribute by hash(id);
CREATE TABLE
unvdb=# insert into a1 select id,random()*100  from generate_series(1, 100000) id;
INSERT 0 100000
unvdb=# create table a2 (id int,id1 int) distribute by hash(id);
CREATE TABLE
unvdb=# create table a3 (id int,id1 int) distribute by replication;
CREATE TABLE
unvdb=# insert into a2 select * from a1 where id<=60000;
INSERT 0 60000
unvdb=# insert into a3 select * from a1 where id<=1000;
INSERT 0 1000
unvdb=# analyze a1;
ANALYZE
unvdb=# analyze a2;
ANALYZE
unvdb=# analyze a3;
ANALYZE
避免数据重分布的一些原则
内连接时,关联条件和分片条件一致,不会引起据的重分布问题。关联的左右表中,只要有一张是复制表,也不会引起据的重分布问题。
左连接时,即使关联条件和分片条件一致,也会引起数据重分布。但当右表是全表(复制表或其他手段满足全表要求),则计算可以在本节点完成,不会引起数据的重分布问题。
右连接相反,左表是全表时,不会引起数据的重分布问题。
inner join
(DISTRIBUTE BY HASH) inner join (DISTRIBUTE BY REPLICATION) [下文简称 hash inner join rep]
1.1 不会引起数据的重分布问题(分片键关联)
unvdb=# explain  (verbose,analyze) select a.id,count(*) from a1 a inner join a3 b on a.id = b.id group by a.id;
                                                QUERY PLAN
----------------------------------------------------------------------------------------------------------
 Cluster Gather  (cost=1590.23..1624.18 rows=111 width=12) (actual time=5.277..9.569 rows=1000 loops=1)
   Remote node: 16386,16387,16388
   ->  GroupAggregate  (cost=1590.23..1590.88 rows=37 width=12) (actual time=0.003..0.004 rows=0 loops=1)
         Output: a.id, count(*)
         Group Key: a.id
         Node 16387: (actual time=7.199..7.309 rows=338 loops=1)
         Node 16388: (actual time=5.038..5.152 rows=344 loops=1)
         Node 16386: (actual time=5.918..6.046 rows=318 loops=1)
         ->  Sort  (cost=1590.23..1590.33 rows=37 width=4) (never executed)
               Output: a.id
               Sort Key: a.id
               Node 16387: (actual time=7.183..7.201 rows=338 loops=1)
               Node 16388: (actual time=5.016..5.041 rows=344 loops=1)
               Node 16386: (actual time=5.905..5.929 rows=318 loops=1)
               ->  Hash Join  (cost=19.16..1589.27 rows=37 width=4) (never executed)
                     Output: a.id
                     Hash Cond: (a.id = b.id)
                     Node 16387: (actual time=0.261..7.140 rows=338 loops=1)
                     Node 16388: (actual time=0.215..4.980 rows=344 loops=1)
                     Node 16386: (actual time=0.241..5.868 rows=318 loops=1)
                     ->  Seq Scan on public.a1 a  (cost=0.00..1444.00 rows=33333 width=4) (never executed)
                           Output: a.id, a.id1
                           Remote node: 16386,16387,16388
                           Node 16387: (actual time=0.008..2.678 rows=33531 loops=1)
                           Node 16388: (actual time=0.005..1.876 rows=33448 loops=1)
                           Node 16386: (actual time=0.008..2.135 rows=33021 loops=1)
                     ->  Hash  (cost=15.00..15.00 rows=333 width=4) (never executed)
                           Output: b.id
                           Node 16387: (actual time=0.230..0.231 rows=1000 loops=1)
                           Node 16388: (actual time=0.187..0.188 rows=1000 loops=1)
                           Node 16386: (actual time=0.205..0.206 rows=1000 loops=1)
                           ->  Seq Scan on public.a3 b  (cost=0.00..15.00 rows=333 width=4) (never executed)
                                 Output: b.id
                                 Remote node: 16386,16387,16388
                                 Node 16387: (actual time=0.014..0.118 rows=1000 loops=1)
                                 Node 16388: (actual time=0.014..0.093 rows=1000 loops=1)
                                 Node 16386: (actual time=0.014..0.102 rows=1000 loops=1)
 Planning Time: 0.203 ms
 Execution Time: 10.211 ms
 (39 rows)
1.2 不会引起数据的重分布问题(非分片键关联)
unvdb=# explain  (verbose,analyze) select a.id,count(*) from a1 a inner join a3 b on a.id1 = b.id group by a.id;
                                                   QUERY PLAN
----------------------------------------------------------------------------------------------------------------
 Cluster Gather  (cost=1717.66..5084.66 rows=11100 width=12) (actual time=18.268..69.219 rows=99501 loops=1)
   Remote node: 16386,16387,16388
   ->  HashAggregate  (cost=1717.66..1754.66 rows=3700 width=12) (actual time=0.000..0.003 rows=0 loops=1)
         Output: a.id, count(*)
         Group Key: a.id
         Node 16387: (actual time=18.175..27.346 rows=33383 loops=1)
         Node 16386: (actual time=18.531..29.922 rows=32853 loops=1)
         Node 16388: (actual time=23.620..36.296 rows=33265 loops=1)
         ->  Hash Join  (cost=19.16..1699.16 rows=3700 width=4) (never executed)
               Output: a.id
               Hash Cond: (a.id1 = b.id)
               Node 16387: (actual time=0.243..8.710 rows=33383 loops=1)
               Node 16386: (actual time=0.247..8.913 rows=32853 loops=1)
               Node 16388: (actual time=0.258..8.953 rows=33265 loops=1)
               ->  Seq Scan on public.a1 a  (cost=0.00..1444.00 rows=33333 width=8) (never executed)
                     Output: a.id, a.id1
                     Remote node: 16386,16387,16388
                     Node 16387: (actual time=0.004..2.063 rows=33531 loops=1)
                     Node 16386: (actual time=0.004..2.092 rows=33021 loops=1)
                     Node 16388: (actual time=0.004..2.008 rows=33448 loops=1)
               ->  Hash  (cost=15.00..15.00 rows=333 width=4) (never executed)
                     Output: b.id
                     Node 16387: (actual time=0.231..0.232 rows=1000 loops=1)
                     Node 16386: (actual time=0.236..0.237 rows=1000 loops=1)
                     Node 16388: (actual time=0.247..0.248 rows=1000 loops=1)
                     ->  Seq Scan on public.a3 b  (cost=0.00..15.00 rows=333 width=4) (never executed)
                           Output: b.id
                           Remote node: 16386,16387,16388
                           Node 16387: (actual time=0.014..0.107 rows=1000 loops=1)
                           Node 16386: (actual time=0.013..0.120 rows=1000 loops=1)
                           Node 16388: (actual time=0.013..0.128 rows=1000 loops=1)
 Planning Time: 0.152 ms
 Execution Time: 76.386 ms
 (33 rows)
hash inner join hash
2.1 不会引起数据的重分布问题(分片键关联)
unvdb=# explain  (verbose,analyze) select a.id,count(*) from a1 a inner join a2 b on a.id = b.id group by a.id;
                                                  QUERY PLAN
---------------------------------------------------------------------------------------------------------------
 Cluster Gather  (cost=2762.78..4785.10 rows=6667 width=12) (actual time=17.960..70.288 rows=60000 loops=1)
   Remote node: 16386,16387,16388
   ->  HashAggregate  (cost=2762.78..2785.00 rows=2222 width=12) (actual time=0.000..0.002 rows=0 loops=1)
         Output: a.id, count(*)
         Group Key: a.id
         Node 16387: (actual time=17.743..21.554 rows=20075 loops=1)
         Node 16388: (actual time=28.101..34.517 rows=20047 loops=1)
         Node 16386: (actual time=25.722..30.778 rows=19878 loops=1)
         ->  Hash Join  (cost=1116.00..2751.67 rows=2222 width=4) (never executed)
               Output: a.id
               Hash Cond: (a.id = b.id)
               Node 16387: (actual time=4.199..12.101 rows=20075 loops=1)
               Node 16388: (actual time=5.486..19.172 rows=20047 loops=1)
               Node 16386: (actual time=6.292..17.269 rows=19878 loops=1)
               ->  Seq Scan on public.a1 a  (cost=0.00..1444.00 rows=33333 width=4) (never executed)
                     Output: a.id, a.id1
                     Remote node: 16386,16387,16388
                     Node 16387: (actual time=0.007..1.941 rows=33531 loops=1)
                     Node 16388: (actual time=0.009..3.253 rows=33448 loops=1)
                     Node 16386: (actual time=0.010..2.577 rows=33021 loops=1)
               ->  Hash  (cost=866.00..866.00 rows=20000 width=4) (never executed)
                     Output: b.id
                     Node 16387: (actual time=4.055..4.056 rows=20075 loops=1)
                     Node 16388: (actual time=5.338..5.339 rows=20047 loops=1)
                     Node 16386: (actual time=6.102..6.103 rows=19878 loops=1)
                     ->  Seq Scan on public.a2 b  (cost=0.00..866.00 rows=20000 width=4) (never executed)
                           Output: b.id
                           Remote node: 16386,16387,16388
                           Node 16387: (actual time=0.043..1.710 rows=20075 loops=1)
                           Node 16388: (actual time=0.022..2.270 rows=20047 loops=1)
                           Node 16386: (actual time=0.034..2.557 rows=19878 loops=1)
 Planning Time: 0.205 ms
 Execution Time: 74.162 ms
(33 rows)
2.2 引起数据的重分布问题(不完全匹配分片键关联)
unvdb=# explain  (verbose,analyze) select a.id,count(*) from a1 a inner join a2 b on a.id = b.id1 group by a.id;
                                                  QUERY PLAN
--------------------------------------------------------------------------------------------------------------
 Cluster Gather  (cost=7000.44..9022.77 rows=6667 width=12) (actual time=29.835..30.513 rows=100 loops=1)
   Remote node: 16386,16387,16388
   ->  HashAggregate  (cost=6000.44..6022.67 rows=2222 width=12) (actual time=0.000..0.001 rows=0 loops=1)
         Output: a.id, count(*)
         Group Key: a.id
         Node 16388: (actual time=29.741..29.759 rows=32 loops=1)
         Node 16386: (actual time=29.605..29.631 rows=36 loops=1)
         Node 16387: (actual time=29.983..30.013 rows=32 loops=1)
         ->  Hash Join  (cost=1861.66..5989.33 rows=2222 width=4) (never executed)
               Output: a.id
               Hash Cond: (b.id1 = a.id)
               Node 16388: (actual time=7.699..27.273 rows=19316 loops=1)
               Node 16386: (actual time=11.285..25.829 rows=21490 loops=1)
               Node 16387: (actual time=7.968..27.490 rows=18895 loops=1)
               ->  Cluster Reduce  (cost=1.00..3987.00 rows=20000 width=4) (never executed)
                     Reduce: ('[0:2]={16386,16387,16388}'::oid[])[COALESCE(hash_combin_mod(3, hashint4(b.id1)), 0)]
                     Node 16388: (actual time=0.182..16.698 rows=19316 loops=1)
                     Node 16386: (actual time=1.162..10.980 rows=21490 loops=1)
                     Node 16387: (actual time=0.184..16.452 rows=19194 loops=1)
                     ->  Seq Scan on public.a2 b  (cost=0.00..866.00 rows=20000 width=4) (never executed)
                           Output: b.id, b.id1
                           Remote node: 16386,16387,16388
                           Node 16388: (actual time=0.013..1.453 rows=20047 loops=1)
                           Node 16386: (actual time=0.010..1.826 rows=19878 loops=1)
                           Node 16387: (actual time=0.013..1.451 rows=20075 loops=1)
               ->  Hash  (cost=1444.00..1444.00 rows=33333 width=4) (never executed)
                     Output: a.id
                     Node 16388: (actual time=7.241..7.241 rows=33448 loops=1)
                     Node 16386: (actual time=9.834..9.835 rows=33021 loops=1)
                     Node 16387: (actual time=7.484..7.485 rows=33531 loops=1)
                     ->  Seq Scan on public.a1 a  (cost=0.00..1444.00 rows=33333 width=4) (never executed)
                           Output: a.id
                           Remote node: 16386,16387,16388
                           Node 16388: (actual time=0.011..3.070 rows=33448 loops=1)
                           Node 16386: (actual time=0.013..4.348 rows=33021 loops=1)
                           Node 16387: (actual time=0.012..3.188 rows=33531 loops=1)
 Planning Time: 0.330 ms
 Execution Time: 34.055 ms
(38 rows)
优化建议
根据上面介绍的原则,可以将内关联的任何一张表改为复制表。
再从数据量考虑,选择数据量较小的一张表,改造为复制表,即可解决数据重分布问题,提升sql的执行效率。
left join
hash left join rep
1.1 不会引起数据的重分布问题(分片键关联)
unvdb=# explain  (verbose,analyze) select a.id,count(*) from a1 a left join a3 b on a.id = b.id group by a.id;
                                                   QUERY PLAN
-----------------------------------------------------------------------------------------------------------------
 Finalize GroupAggregate  (cost=3002.57..3697.01 rows=33333 width=12) (actual time=12.940..90.481 rows=100000 loops=1)
   Output: a.id, count(*)
   Group Key: a.id
   ->  Cluster Merge Gather  (cost=3002.57..3197.02 rows=33333 width=12) (actual time=12.929..41.206 rows=100000 loops=1)
         Remote node: 16386,16387,16388
         Sort Key: a.id
         ->  Partial GroupAggregate  (cost=2335.91..2530.36 rows=11111 width=12) (actual time=0.011..0.015 rows=0 loops=1)
               Output: a.id, PARTIAL count(*)
               Group Key: a.id
               Node 16386: (actual time=13.543..28.465 rows=33021 loops=1)
               Node 16387: (actual time=12.652..23.426 rows=33531 loops=1)
               Node 16388: (actual time=10.409..21.935 rows=33448 loops=1)
               ->  Sort  (cost=2335.91..2363.69 rows=11111 width=4) (actual time=0.011..0.014 rows=0 loops=1)
                     Output: a.id
                     Sort Key: a.id
                     Sort Method: quicksort  Memory: 25kB
                     Node 16386: (actual time=13.534..15.971 rows=33021 loops=1)
                     Node 16387: (actual time=12.641..14.515 rows=33531 loops=1)
                     Node 16388: (actual time=10.399..12.357 rows=33448 loops=1)
                     ->  Hash Left Join  (cost=19.16..1589.27 rows=11111 width=4) (actual time=0.008..0.011 rows=0 loops=1)
                           Output: a.id
                           Hash Cond: (a.id = b.id)
                           Node 16386: (actual time=0.201..7.359 rows=33021 loops=1)
                           Node 16387: (actual time=0.205..6.923 rows=33531 loops=1)
                           Node 16388: (actual time=0.224..6.758 rows=33448 loops=1)
                           ->  Seq Scan on public.a1 a  (cost=0.00..1444.00 rows=33333 width=4) (actual time=0.001..0.002 rows=0 loops=1)
                                 Output: a.id, a.id1
                                 Remote node: 16386,16387,16388
                                 Node 16386: (actual time=0.004..2.226 rows=33021 loops=1)
                                 Node 16387: (actual time=0.004..2.024 rows=33531 loops=1)
                                 Node 16388: (actual time=0.005..1.977 rows=33448 loops=1)
                           ->  Hash  (cost=15.00..15.00 rows=333 width=4) (actual time=0.003..0.004 rows=0 loops=1)
                                 Output: b.id
                                 Buckets: 1024  Batches: 1  Memory Usage: 8kB
                                 Node 16386: (actual time=0.190..0.191 rows=1000 loops=1)
                                 Node 16387: (actual time=0.192..0.193 rows=1000 loops=1)
                                 Node 16388: (actual time=0.211..0.212 rows=1000 loops=1)
                                 ->  Seq Scan on public.a3 b  (cost=0.00..15.00 rows=333 width=4) (actual time=0.003..0.003 rows=0 loops=1)
                                       Output: b.id
                                       Remote node: 16386,16387,16388
                                       Node 16386: (actual time=0.012..0.097 rows=1000 loops=1)
                                       Node 16387: (actual time=0.019..0.104 rows=1000 loops=1)
                                       Node 16388: (actual time=0.013..0.098 rows=1000 loops=1)
 Planning Time: 0.289 ms
 Execution Time: 98.847 ms
(45 rows)
1.2 不会引起数据的重分布问题(不完全匹配分片键关联,但右表是全表)
unvdb=# explain  (verbose,analyze) select a.id,count(*) from a1 a left join a3 b on a.id1 = b.id group by a.id;
                                                   QUERY PLAN
-----------------------------------------------------------------------------------------------------------------
 Finalize GroupAggregate  (cost=3112.46..3806.90 rows=33333 width=12) (actual time=23.712..103.501 rows=100000 loops=1)
   Output: a.id, count(*)
   Group Key: a.id
   ->  Cluster Merge Gather  (cost=3112.46..3306.91 rows=33333 width=12) (actual time=23.697..58.596 rows=100000 loops=1)
         Remote node: 16386,16387,16388
         Sort Key: a.id
         ->  Partial GroupAggregate  (cost=2445.80..2640.25 rows=11111 width=12) (actual time=0.016..0.020 rows=0 loops=1)
               Output: a.id, PARTIAL count(*)
               Group Key: a.id
               Node 16386: (actual time=23.793..37.425 rows=33021 loops=1)
               Node 16387: (actual time=15.156..25.454 rows=33531 loops=1)
               Node 16388: (actual time=12.387..23.180 rows=33448 loops=1)
               ->  Sort  (cost=2445.80..2473.58 rows=11111 width=4) (actual time=0.016..0.019 rows=0 loops=1)
                     Output: a.id
                     Sort Key: a.id
                     Sort Method: quicksort  Memory: 25kB
                     Node 16386: (actual time=23.780..26.378 rows=33021 loops=1)
                     Node 16387: (actual time=15.145..16.838 rows=33531 loops=1)
                     Node 16388: (actual time=12.378..14.173 rows=33448 loops=1)
                     ->  Hash Left Join  (cost=19.16..1699.16 rows=11111 width=4) (actual time=0.013..0.016 rows=0 loops=1)
                           Output: a.id
                           Hash Cond: (a.id1 = b.id)
                           Node 16386: (actual time=0.243..11.433 rows=33021 loops=1)
                           Node 16387: (actual time=0.223..8.398 rows=33531 loops=1)
                           Node 16388: (actual time=0.191..7.827 rows=33448 loops=1)
                           ->  Seq Scan on public.a1 a  (cost=0.00..1444.00 rows=33333 width=8) (actual time=0.007..0.007 rows=0 loops=1)
                                 Output: a.id, a.id1
                                 Remote node: 16386,16387,16388
                                 Node 16386: (actual time=0.007..2.701 rows=33021 loops=1)
                                 Node 16387: (actual time=0.005..2.093 rows=33531 loops=1)
                                 Node 16388: (actual time=0.004..1.974 rows=33448 loops=1)
                           ->  Hash  (cost=15.00..15.00 rows=333 width=4) (actual time=0.003..0.004 rows=0 loops=1)
                                 Output: b.id
                                 Buckets: 1024  Batches: 1  Memory Usage: 8kB
                                 Node 16386: (actual time=0.227..0.228 rows=1000 loops=1)
                                 Node 16387: (actual time=0.212..0.213 rows=1000 loops=1)
                                 Node 16388: (actual time=0.181..0.182 rows=1000 loops=1)
                                 ->  Seq Scan on public.a3 b  (cost=0.00..15.00 rows=333 width=4) (actual time=0.003..0.003 rows=0 loops=1)
                                       Output: b.id
                                       Remote node: 16386,16387,16388
                                       Node 16386: (actual time=0.012..0.114 rows=1000 loops=1)
                                       Node 16387: (actual time=0.014..0.125 rows=1000 loops=1)
                                       Node 16388: (actual time=0.013..0.094 rows=1000 loops=1)
 Planning Time: 0.212 ms
 Execution Time: 110.385 ms
(45 rows)
rep left join hash
2.1 引起数据的重分布问题(分片键关联)
unvdb=# explain  (verbose,analyze) select a.id,count(*) from a3 a left join a1 b on a.id = b.id group by a.id;
                                                      QUERY PLAN
----------------------------------------------------------------------------------------------------------------------
 Cluster Gather  (cost=23639.24..23744.97 rows=333 width=12) (actual time=31.583..36.091 rows=1000 loops=1)
   Remote node: 16386,16387,16388
   ->  Result  (cost=22639.24..22645.07 rows=333 width=12) (actual time=0.002..0.004 rows=0 loops=1)
         Output: a.id, (count(*))
         Filter: (udb_node_oid() = '16386'::oid)
         Node 16388: (actual time=32.104..32.105 rows=0 loops=1)
         Node 16387: (actual time=32.101..32.103 rows=0 loops=1)
         Node 16386: (actual time=31.334..31.901 rows=1000 loops=1)
         ->  GroupAggregate  (cost=22639.24..22645.07 rows=333 width=12) (actual time=0.000..0.001 rows=0 loops=1)
               Output: a.id, count(*)
               Group Key: a.id
               Node 16388: (actual time=31.793..32.064 rows=1000 loops=1)
               Node 16387: (actual time=31.785..32.060 rows=1000 loops=1)
               Node 16386: (actual time=31.332..31.780 rows=1000 loops=1)
               ->  Sort  (cost=22639.24..22640.07 rows=333 width=4) (never executed)
                     Output: a.id
                     Sort Key: a.id
                     Node 16388: (actual time=31.784..31.828 rows=1000 loops=1)
                     Node 16387: (actual time=31.776..31.822 rows=1000 loops=1)
                     Node 16386: (actual time=31.322..31.404 rows=1000 loops=1)
                     ->  Hash Right Join  (cost=20.16..22625.29 rows=333 width=4) (never executed)
                           Output: a.id
                           Hash Cond: (b.id = a.id)
                           Node 16388: (actual time=0.335..31.635 rows=1000 loops=1)
                           Node 16387: (actual time=0.360..31.627 rows=1000 loops=1)
                           Node 16386: (actual time=0.377..31.157 rows=1000 loops=1)
                           ->  Cluster Reduce  (cost=1.00..22227.80 rows=99999 width=4) (never executed)
                                 Reduce: unnest('[0:2]={16386,16387,16388}'::oid[])
                                 Node 16388: (actual time=0.132..23.931 rows=100000 loops=1)
                                 Node 16387: (actual time=0.161..23.442 rows=100000 loops=1)
                                 Node 16386: (actual time=0.165..21.345 rows=100000 loops=1)
                                 ->  Seq Scan on public.a1 b  (cost=0.00..1444.00 rows=33333 width=4) (never executed)
                                       Output: b.id, b.id1
                                       Remote node: 16386,16387,16388
                                       Node 16388: (actual time=0.005..2.054 rows=33448 loops=1)
                                       Node 16387: (actual time=0.006..2.035 rows=33531 loops=1)
                                       Node 16386: (actual time=0.010..2.237 rows=33021 loops=1)
                           ->  Hash  (cost=15.00..15.00 rows=333 width=4) (never executed)
                                 Output: a.id
                                 Node 16388: (actual time=0.193..0.194 rows=1000 loops=1)
                                 Node 16387: (actual time=0.192..0.192 rows=1000 loops=1)
                                 Node 16386: (actual time=0.204..0.205 rows=1000 loops=1)
                                 ->  Seq Scan on public.a3 a  (cost=0.00..15.00 rows=333 width=4) (never executed)
                                       Output: a.id
                                       Remote node: 16386,16387,16388
                                       Node 16388: (actual time=0.012..0.092 rows=1000 loops=1)
                                       Node 16387: (actual time=0.014..0.101 rows=1000 loops=1)
                                       Node 16386: (actual time=0.011..0.109 rows=1000 loops=1)
 Planning Time: 0.210 ms
 Execution Time: 37.096 ms
(50 rows)
2.2 引起数据的重分布问题(不完全匹配分片键关联)
unvdb=# explain  (verbose,analyze) select a.id,count(*) from a3 a left join a1 b on a.id = b.id1 group by a.id;
                                                    QUERY PLAN
-------------------------------------------------------------------------------------------------------------------
 Cluster Gather  (cost=24010.46..24113.69 rows=333 width=12) (actual time=64.117..68.214 rows=1000 loops=1)
   Remote node: 16386,16387,16388
   ->  Result  (cost=23010.46..23013.79 rows=333 width=12) (actual time=0.003..0.004 rows=0 loops=1)
         Output: a.id, (count(*))
         Filter: (udb_node_oid() = '16386'::oid)
         Node 16388: (actual time=64.617..64.618 rows=0 loops=1)
         Node 16387: (actual time=64.792..64.794 rows=0 loops=1)
         Node 16386: (actual time=63.940..64.226 rows=1000 loops=1)
         ->  HashAggregate  (cost=23010.46..23013.79 rows=333 width=12) (actual time=0.000..0.001 rows=0 loops=1)
               Output: a.id, count(*)
               Group Key: a.id
               Node 16388: (actual time=64.469..64.575 rows=1000 loops=1)
               Node 16387: (actual time=64.624..64.732 rows=1000 loops=1)
               Node 16386: (actual time=63.937..64.121 rows=1000 loops=1)
               ->  Hash Right Join  (cost=20.16..22954.96 rows=11100 width=4) (never executed)
                     Output: a.id
                     Hash Cond: (b.id1 = a.id)
                     Node 16388: (actual time=0.340..51.504 rows=100401 loops=1)
                     Node 16387: (actual time=0.359..51.955 rows=100401 loops=1)
                     Node 16386: (actual time=0.395..46.414 rows=100401 loops=1)
                     ->  Cluster Reduce  (cost=1.00..22227.80 rows=99999 width=4) (never executed)
                           Reduce: unnest('[0:2]={16386,16387,16388}'::oid[])
                           Node 16388: (actual time=0.127..35.490 rows=100000 loops=1)
                           Node 16387: (actual time=0.170..35.933 rows=100000 loops=1)
                           Node 16386: (actual time=0.155..22.972 rows=100000 loops=1)
                           ->  Seq Scan on public.a1 b  (cost=0.00..1444.00 rows=33333 width=4) (never executed)
                                 Output: b.id, b.id1
                                 Remote node: 16386,16387,16388
                                 Node 16388: (actual time=0.008..1.989 rows=33448 loops=1)
                                 Node 16387: (actual time=0.005..2.060 rows=33531 loops=1)
                                 Node 16386: (actual time=0.018..2.238 rows=33021 loops=1)
                     ->  Hash  (cost=15.00..15.00 rows=333 width=4) (never executed)
                           Output: a.id
                           Node 16388: (actual time=0.205..0.206 rows=1000 loops=1)
                           Node 16387: (actual time=0.182..0.183 rows=1000 loops=1)
                           Node 16386: (actual time=0.230..0.230 rows=1000 loops=1)
                           ->  Seq Scan on public.a3 a  (cost=0.00..15.00 rows=333 width=4) (never executed)
                                 Output: a.id
                                 Remote node: 16386,16387,16388
                                 Node 16388: (actual time=0.013..0.096 rows=1000 loops=1)
                                 Node 16387: (actual time=0.013..0.093 rows=1000 loops=1)
                                 Node 16386: (actual time=0.017..0.124 rows=1000 loops=1)
 Planning Time: 0.240 ms
 Execution Time: 69.218 ms
(44 rows)
hash left join hash
3.1 不会引起数据的重分布问题(分片键关联)
unvdb=# explain  (verbose,analyze) select a.id,count(*) from a1 a left join a2 b on a.id = b.id group by a.id;
                                                    QUERY PLAN
-------------------------------------------------------------------------------------------------------------------
 Finalize GroupAggregate  (cost=4164.97..4859.41 rows=33333 width=12) (actual time=23.814..96.179 rows=100000 loops=1)
   Output: a.id, count(*)
   Group Key: a.id
   ->  Cluster Merge Gather  (cost=4164.97..4359.41 rows=33333 width=12) (actual time=23.784..54.535 rows=100000 loops=1)
         Remote node: 16386,16387,16388
         Sort Key: a.id
         ->  Partial GroupAggregate  (cost=3498.31..3692.75 rows=11111 width=12) (actual time=0.062..0.066 rows=0 loops=1)
               Output: a.id, PARTIAL count(*)
               Group Key: a.id
               Node 16386: (actual time=23.743..42.146 rows=33021 loops=1)
               Node 16387: (actual time=19.342..30.273 rows=33531 loops=1)
               Node 16388: (actual time=16.629..26.998 rows=33448 loops=1)
               ->  Sort  (cost=3498.31..3526.09 rows=11111 width=4) (actual time=0.062..0.065 rows=0 loops=1)
                     Output: a.id
                     Sort Key: a.id
                     Sort Method: quicksort  Memory: 25kB
                     Node 16386: (actual time=23.733..26.259 rows=33021 loops=1)
                     Node 16387: (actual time=19.332..21.190 rows=33531 loops=1)
                     Node 16388: (actual time=16.620..18.277 rows=33448 loops=1)
                     ->  Hash Left Join  (cost=1116.00..2751.67 rows=11111 width=4) (actual time=0.059..0.062 rows=0 loops=1)
                           Output: a.id
                           Hash Cond: (a.id = b.id)
                           Node 16386: (actual time=6.729..16.474 rows=33021 loops=1)
                           Node 16387: (actual time=4.180..12.768 rows=33531 loops=1)
                           Node 16388: (actual time=4.030..12.159 rows=33448 loops=1)
                           ->  Seq Scan on public.a1 a  (cost=0.00..1444.00 rows=33333 width=4) (actual time=0.002..0.003 rows=0 loops=1)
                                 Output: a.id, a.id1
                                 Remote node: 16386,16387,16388
                                 Node 16386: (actual time=0.010..2.200 rows=33021 loops=1)
                                 Node 16387: (actual time=0.008..1.994 rows=33531 loops=1)
                                 Node 16388: (actual time=0.006..1.945 rows=33448 loops=1)
                           ->  Hash  (cost=866.00..866.00 rows=20000 width=4) (actual time=0.023..0.024 rows=0 loops=1)
                                 Output: b.id
                                 Buckets: 32768  Batches: 1  Memory Usage: 256kB
                                 Node 16386: (actual time=6.643..6.644 rows=19878 loops=1)
                                 Node 16387: (actual time=4.115..4.116 rows=20075 loops=1)
                                 Node 16388: (actual time=3.961..3.963 rows=20047 loops=1)
                                 ->  Seq Scan on public.a2 b  (cost=0.00..866.00 rows=20000 width=4) (actual time=0.023..0.023 rows=0 loops=1)
                                       Output: b.id
                                       Remote node: 16386,16387,16388
                                       Node 16386: (actual time=0.017..2.796 rows=19878 loops=1)
                                       Node 16387: (actual time=0.015..1.739 rows=20075 loops=1)
                                       Node 16388: (actual time=0.017..1.709 rows=20047 loops=1)
 Planning Time: 0.276 ms
 Execution Time: 102.716 ms
(45 rows)
优化建议
根据上面介绍的原则,可以将左关联的右表改为复制表。
再从数据量考虑,若右表数据量<1000万,则适合改造为复制表;否则会占用太多存储空间。
3.2 引起数据的重分布问题(不完全匹配分片键关联)
unvdb=# explain  (verbose,analyze) select a.id,count(*) from a1 a left join a2 b on a.id = b.id1 group by a.id;
                                                    QUERY PLAN
-------------------------------------------------------------------------------------------------------------------
 Finalize GroupAggregate  (cost=8402.64..9097.07 rows=33333 width=12) (actual time=37.027..101.101 rows=100000 loops=1)
   Output: a.id, count(*)
   Group Key: a.id
   ->  Cluster Merge Gather  (cost=8402.64..8597.08 rows=33333 width=12) (actual time=37.018..67.300 rows=100000 loops=1)
         Remote node: 16386,16387,16388
         Sort Key: a.id
         ->  Partial GroupAggregate  (cost=6735.98..6930.42 rows=11111 width=12) (actual time=0.066..0.069 rows=0 loops=1)
               Output: a.id, PARTIAL count(*)
               Group Key: a.id
               Node 16387: (actual time=35.780..52.051 rows=33531 loops=1)
               Node 16386: (actual time=36.817..56.414 rows=33021 loops=1)
               Node 16388: (actual time=35.971..52.237 rows=33448 loops=1)
               ->  Sort  (cost=6735.98..6763.75 rows=11111 width=4) (actual time=0.066..0.068 rows=0 loops=1)
                     Output: a.id
                     Sort Key: a.id
                     Sort Method: quicksort  Memory: 25kB
                     Node 16387: (actual time=35.647..41.890 rows=52394 loops=1)
                     Node 16386: (actual time=36.679..43.595 rows=54475 loops=1)
                     Node 16388: (actual time=35.840..41.936 rows=52732 loops=1)
                     ->  Hash Right Join  (cost=1861.66..5989.33 rows=11111 width=4) (actual time=0.063..0.065 rows=0 loops=1)
                           Output: a.id
                           Hash Cond: (b.id1 = a.id)
                           Node 16387: (actual time=7.507..24.853 rows=52394 loops=1)
                           Node 16386: (actual time=8.023..24.093 rows=54475 loops=1)
                           Node 16388: (actual time=7.557..25.027 rows=52732 loops=1)
                           ->  Cluster Reduce  (cost=1.00..3987.00 rows=20000 width=4) (never executed)
                                 Reduce: ('[0:2]={16386,16387,16388}'::oid[])[COALESCE(hash_combin_mod(3, hashint4(b.id1)), 0)]
                                 Node 16387: (actual time=0.173..10.655 rows=19194 loops=1)
                                 Node 16386: (actual time=0.159..8.719 rows=21490 loops=1)
                                 Node 16388: (actual time=0.200..10.604 rows=19316 loops=1)
                                 ->  Seq Scan on public.a2 b  (cost=0.00..866.00 rows=20000 width=4) (never executed)
                                       Output: b.id, b.id1
                                       Remote node: 16386,16387,16388
                                       Node 16387: (actual time=0.009..1.377 rows=20075 loops=1)
                                       Node 16386: (actual time=0.014..1.594 rows=19878 loops=1)
                                       Node 16388: (actual time=0.013..1.423 rows=20047 loops=1)
                           ->  Hash  (cost=1444.00..1444.00 rows=33333 width=4) (actual time=0.008..0.008 rows=0 loops=1)
                                 Output: a.id
                                 Buckets: 65536  Batches: 1  Memory Usage: 512kB
                                 Node 16387: (actual time=7.281..7.282 rows=33531 loops=1)
                                 Node 16386: (actual time=7.782..7.783 rows=33021 loops=1)
                                 Node 16388: (actual time=7.301..7.302 rows=33448 loops=1)
                                 ->  Seq Scan on public.a1 a  (cost=0.00..1444.00 rows=33333 width=4) (actual time=0.006..0.006 rows=0 loops=1)
                                       Output: a.id
                                       Remote node: 16386,16387,16388
                                       Node 16387: (actual time=0.028..3.138 rows=33531 loops=1)
                                       Node 16386: (actual time=0.013..3.418 rows=33021 loops=1)
                                       Node 16388: (actual time=0.010..3.264 rows=33448 loops=1)
 Planning Time: 0.390 ms
 Execution Time: 107.293 ms
(50 rows)
right join
和left join类似,只是方向正好相反。
分区
需要先创建主表,然后创建分区(即子表)。
目前支持list、range分区。
分片/分区的区别
分片,类似于分库,属于水平切分,将一张表按照某种规则放到多个数据节点中。
分区,局限于单一数据节点,将一张表分散存储在不同的物理块中。
分片和分区不冲突。
优化建议
1. 待导入的数据,尽量采用排过序的数据,增加数据的亲和度
2. 数据导入后,手工执行一次 analyze
3. 避免内存命中率低,shared_buffers 尽量调大,减少shared_buffers和os缓存间的交互
4. 建表原则:小表复制,大表分片
5. 简化复杂sql:采用视图/CTE简化sql
6. 排序的数据量较大,可以提高work_mem的配置
7. 避免返回的结果集太大,可以使用分页功能
8. 避免执行大量的小查询,可以放在一个事务内
9. 分组字段有多个时,可以采用分组数最少的字段作为第一个分组字段
10. 分区表使用较多的场景,可以设置constraint_exclusion=on,避免扫描所有分区
11. 需要排序的字段,可以创建索引
12. 关联条件的字段,可以创建索引
13. where条件的字段,可以创建索引
14. 单表等值查询,可以使用辅助索引
15. 目标列和/或过滤条件较少,可以创建联合索引,即复合索引
16. 过滤条件的字段顺序经常发生变化,可以创建bloom索引
17. 以函数作为过滤条件的,可以创建对应的函数索引
18. 绑定的变量类型与索引字段的数据类型,保持一致,否则由于隐式转换的原因,导致用不上该索引
读写分离
用户连接Coordinator,执行SQL语句,最终数据的修改和查询都会访问Datanode。一般情况下Datanode有同步或者异步备节点。如果是同步备节点,则数据与主节点实时一致,因此备节点可以提供数据查询的功能。但是当主节点正常工作时,备节点只提供数据备份的功能,造成机器资源的浪费。
UDBDT从内核层面实现了读写分离,打开读写分离的开关,就可以实现,执行的读操作访问备节点,写操作访问主节点,对应用层完全透明,有效提升主从机器资源的使用率,增加数据库的吞吐量。
读写分离控制参数
读写分离涉及的开关有两个,在Udbmgr上通过参数设置的方式开启读写分离功能,如下:
有同步节点的情况下:
set coordinator all(enable_readsql_on_slave = on);
没有同步节点,只有异步节点,并希望异步节点提供读的功能的情况下:
set coordinator all(enable_readsql_on_slave = on);
set coordinator all(enable_readsql_on_slave_async = on);
enable_readsql_on_slave:读写分离总开关。
enable_readsql_on_slave_async:允许异步节点提供读的功能开关。
二者关系如下:
| 有同步datanode | 没有同步,只有异步datanode | |
|---|---|---|
| enable_readsql_on_slave = on | 访问同步节点 | 先设置enable_readsql_on_slave_async = on,访问异步节点 |
| enable_readsql_on_slave = off | 不提供读写分离功能 | 不提供读写分离功 |
注意:在并发读写的场景中,如果异步节点提供读的功能,可能出现由于数据同步时间差的问题,导致刚写入的数据查询不到。
检测读写分离功能
读写分离启动之前,uddt_node表中的信息:
eunvdb=# select oid, node_name, node_type from uddt_node;
  oid  | node_name | node_type
-------+-----------+-----------
 16384 | gc1       | C
 12337 | cn1       | C
 16385 | cn2       | C
 16386 | dn1_1     | D
 16387 | dn2_1     | D
 16388 | dn3_1     | D
(6 rows)
没有slave节点信息,所以读操作发到master节点上:
unvdb=# explain (analyze,verbose) select * from tt where c2 = 800;
                                                       QUERY PLAN
------------------------------------------------------------------------------------------------------------------------
 Data Node Scan on "__REMOTE_FQS_QUERY__"  (cost=0.00..0.00 rows=0 width=0) (actual time=2.147..2.149 rows=1 loops=1)
   Output: tt.c1, tt.c2, tt.c3
   Primary node/s: dn1_1
   Node/s: dn1_1, dn2_1, dn3_1
   Remote query: SELECT c1, c2, c3 FROM public.tt tt WHERE (c2 = 800)
 Planning Time: 0.084 ms
 Execution Time: 2.164 ms
(6 rows)
dn2_1 为master节点。
读写分离启用后,在coord的uddt_node表中,会有slave节点信息:
unvdb=# select oid, node_name, node_type from uddt_node;
  oid  | node_name | node_type
-------+-----------+-----------
 16384 | gc1       | C
 12337 | cn1       | C
 16385 | cn2       | C
 16386 | dn1_1     | D
 16387 | dn2_1     | D
 16388 | dn3_1     | D
 16487 | dn1_2     | E
 16488 | dn2_2     | E
 16489 | dn3_2     | E
(9 rows)
上述结果中,E类型的节点即是slave节点。
读操作发到slave节点上:
unvdb=# explain (analyze,verbose) select * from tt where c2 = 800;
                                                       QUERY PLAN
------------------------------------------------------------------------------------------------------------------------
 Data Node Scan on "__REMOTE_FQS_QUERY__"  (cost=0.00..0.00 rows=0 width=0) (actual time=5.696..5.697 rows=1 loops=1)
   Output: tt.c1, tt.c2, tt.c3
   Node/s: dn1_2, dn2_2, dn3_2
   Remote query: SELECT c1, c2, c3 FROM public.tt tt WHERE (c2 = 800)
 Planning Time: 0.047 ms
 Execution Time: 5.710 ms
(6 rows)
dn2_2 为slave节点。
注意事项
某些场景下,开启读写分离且master流复制为同步的时候,在master节点上执行了DML操作,立即查询的时候,发现查不到对应的数据。原因是master节点的DML操作在slave节点还没apply,导致发送到slave节点的查询操作读不到最新的数据。如果想避免这种情况的出现,可以设置datanode的synchronous_commit参数为remote_apply,确保master的操作在slave上apply之后,才给客户端返回消息。
需要注意的是:设置为remote_apply后,会有一定的性能损失。
在线扩容
扩容背景
分布式数据库通常面临海量数据场景,持续的增量数据容易提前达到存储瓶颈,此时我们需要为集群增加节点,进行扩容操作,保证数据库集群健康稳定的运行。
扩容准备
扩容过程中会占用较多的网络和IO资源,如果在扩容期间不能减少数据库操作,需要适当调整部分参数,确保扩容顺利完成。
根据数据库负载适当调大wal保留空间大小(单位:MB):
set datanode master all (wal_keep_size = 1024);
虽然配置了wal_keep_size,但是很多情况下,由于master节点数据量巨大,在扩容期间产生的wal大小可能远超1024MB。 从更安全的角度考虑,建议打开归档模式。
set datanode master all (archive_mode = "on");
set datanode master dn1_1 (archive_command = "rsync -a %p /data2/tom/data/dn1_1/%f");
wal_sender_timeout 默认值是 60 秒。服务端会中断那些停止活动超过指定毫秒数的复制连接。 若在建立流复制期间,由于某些原因,导致在60s内建链失败,则会影响整个扩容流程。 建议在扩容期间,将该参数调整为0,一直等待建立连接。 待扩容结束后,再恢复为默认的60s。
set datanode all (wal_sender_timeout = 0);
其他一些环境检测
--1.测试备机ssh至主机能否成功
ssh datanode_master_ip -p ssh_port
--2.测试备机ud_sql至主机能否成功
ud_sql -p datanode_master_port -h master_ip -d replication

上述任何一个环境检测失败,必然会导致扩容失败
扩容过程
新增host
假设目前集群有两台服务器,通过扩容新增一台服务器。
实际扩容场景多为成倍的扩容,如2台服务器扩容到4台,这样数据可以继续保持均衡性。
unvdb=# list host;
 name  | user  | port | protocol | agentport |     address     |    udbhome
-------+-------+------+----------+-----------+-----------------+----------------
 host01 | tom |   22 | ssh      |      31001 | 192.168.0.11 | /home/tom/app
 host02 | tom |   22 | ssh      |      31001 | 192.168.0.12 | /home/tom/app
add host 添加新的服务器
unvdb=# add host host03(port=22,protocol='ssh',udbhome='/home/tom/app',address="192.168.0.13",agentport=31001,user='tom');
ADD HOST
deploy 数据库程序到新服务器
unvdb=# deploy host03;
 hostname | status | description
----------+--------+-------------
 host03    | t      | success
启动新服务器的agent进程
unvdb=# start agent host03;
 hostname | status | description
----------+--------+-------------
 host03    | t      | success
此时新服务器已经加入到集群中
新增datanode
在新服务器中创建datanode master
unvdb=# add datanode master dn3_1(host='host03', port=19433,path = '/home/tom/udbtx/data/dn3_1');
ADD NODE
需要根据实际情况修改对应的参数内容。
搬迁数据
将dn1_1 中的数据扩容到新的dn3_1 中
expand datanode master dn1_1 to dn3_1;
激活新增节点
expand activate;
此时,扩容工作已经完成,部分数据已经重分布到新的节点上,新插入的表数据也会按照分片规则分布到新的datanode。
数据清除
在数据复制和搬迁过程中会产生冗余数据,通过下列命令,将数据标记删除。
expand clean;
审计
UDB-DT在内核实现了DML和DDL操作的审计功能,提供生成审计日志的能力,这些日志通常是遵守政府、金融或ISO认证所必需的。审计日志以分片表的形式存储在默认数据库unvdb中,并且按日志生成时间分区,每月一个分区。
审计分类
审计分为语句(statement)和对象(object)两个级别,按语句或对象类型又划分为几大类,如下表所示:
statement:
| 语句分类 | 描述 |
|---|---|
| DDL | CREATE/DROP/ALTER objects |
| FUNCTION | Functions and DO blocks |
| READ | SELECTs |
| WRITE | INSERT, UPDATE, DELETE, TRUNCATE |
| ROLE | GRANT/REVOKE, CREATE/ALTER/DROP ROLE |
| SET | SET ... |
| MISC | Statements other than the above |
object:
| 对象分类 | 描述 |
|---|---|
| TABLE | relation tables |
| INDEX | relation indexs |
| VIEW | view/materialized view |
| FOREIGN | foreign tables/fdw |
| ROLE | role/user |
| FUNCTION | function |
| MISC | Objects other than the above |
审计管理员
审计管理员角色为:auditor,仅它拥有修改审计策略及审计日志相关表的权限,保障审计的独立权限(即使超级管理员也不具备auditor的权限)。
审计策略
添加审计策略
--语句级审计
--参数1:语句类型
--参数2:是否审计catalog,默认FALSE
--参数3:审计日志记录的语句最大长度,默认200
--参数4:审计日志记录的模板SQL中变量的最大长度,默认0
select pg_catalog.set_audit_policy_statement('WRITE', FALSE, 256, 0);

--对象级审计
--参数1:语句类型
--参数2:要审计的对象名称匹配表达式,*代表全部,多个以逗号隔开,带-前缀代表排除
--参数3:是否审计catalog,默认FALSE
select pg_catalog.set_audit_policy_object('TABLE', '*,-abc', FALSE);
查看审计策略
unvdb=# select * from audit_policies;
  oid  | audit_level | audit_type | log_catalog | log_statement_maxlen | log_parameter_maxlen
-------+-------------+------------+-------------+----------------------+----------------------
 16413 | STATEMENT   | FUNCTION   | f           |                  200 |                    0
 16414 | STATEMENT   | WRITE      | f           |                  200 |                    0
 16415 | STATEMENT   | READ       | t           |                  200 |                    0
(3 rows)
查看审计日志
result_rows字段为SQL执行结果受影响的行数,当为-1时表示该事务回滚了。
unvdb=# select * from udb_audit_log;
     audit_time      | audit_level | audit_type | commandtag | application_name | userid | transactionid |         statementid         | object_name |
           query_string                    | param_string | result_rows
---------------------+-------------+------------+------------+------------------+--------+---------------+-----------------------------+-------------+---------
-------------------------------------------+--------------+-------------
 2024-07-23 10:03:55 | STATEMENT   | WRITE      | UPDATE     | ud_sql           |     10 |           661 | 1721700235-3116253662-7-4   |             | UPDATE t
est2 SET val = id + 1 WHERE id = change_id |              |           1
 2024-07-23 10:03:55 | STATEMENT   | READ       | SELECT     | ud_sql           |     10 |           661 | 1721700235-3116253662-7-4   |             | SELECT t
est2_change(1)                             |              |           1
 2024-07-23 10:03:55 | STATEMENT   | FUNCTION   | DO         | ud_sql           |     10 |           661 | 1721700235-3116253662-7-4   |             | DO $$ BE
GIN PERFORM test2_change(1); END $$;       |              |
配置参数
--审计日志队列大小,默认128kB
set gtmcoord all (audit_log_queue_size = '128kB');
set coordinator all (audit_log_queue_size = '128kB');

--审计日志保存周期,默认12个月,过期日志会自动清理
set gtmcoord all (audit_log_keep_months = 12);
set coordinator all (audit_log_keep_months = 12);

--审计日志writer进程的执行周期,默认200ms, 范围10ms - 10s
set gtmcoord all (audit_log_writer_period = '200ms');
set coordinator all (audit_log_writer_period = '200ms');
Oracle兼容性
UDBDT除了天然支持Postgresql的SQL语法外,还新增了一些的语法,方便业务端灵活使用。
设置Oracle兼容配置参数
默认数据库语法为unvdb(和PostgreSQL兼容的类型),UDBDT支持在服务器级别、会话级别、语句级别的兼容性开关设置。
服务器级别
登录udbmgr,设置所有coordinator的grammar参数:
unvdb=# set coordinator all (grammar=oracle);
SET PARAM
unvdb=# show param cn1 grammar;
          type          | status |             message
-----------------------------------+---------+----------------------------------------------------
 coordinator master cn1  | t      | debug_print_grammar = off       +
                        |        | grammar = oracle
(1 row)
连接coordinator节点,登录数据库,查看语法参数,并执行Oracle语法语句:
unvdb=# show grammar;
 grammar
---------
 oracle
(1 row)

unvdb=# select * from dual;
 DUMMY
-------
 X
(1 row)
会话级别
如果没有进行服务器级别设置,默认登录数据库后的语法为unvdb:
unvdb=# show grammar;
 grammar
---------
 unvdb
(1 row)
此时执行Oracle语法的语句,会报错:
unvdb=# select * from dual;
ERROR:  relation "dual" does not exist
LINE 1: select * from dual;
session级别切换到Oracle语法,再次执行Oracle语法的语句:
unvdb=# set grammar to oracle;
SET
unvdb=# show grammar ;
 grammar
---------
 oracle
(1 row)

unvdb=# select * from dual;
 DUMMY
-------
 X
(1 row)
执行成功。
语句级别
如果仅仅是某条语句想使用Oracle语法,则可以用hint的方式指定语法:
unvdb=# show grammar ;
 grammar
---------
 unvdb
(1 row)

unvdb=# select * from dual;
ERROR:  relation "dual" does not exist
LINE 1: select * from dual;
                      ^
unvdb=# /*ora*/select * from dual;
 DUMMY
-------
 X
(1 row)

unvdb=# show grammar ;
 grammar
---------
 unvdb
(1 row)
语句级别的设置,在执行SQL语句的开头加上“/ora/”标记: /ora/select now() from dual;
grammar参数 该参数决定了使用数据库时的兼容类型。参数类型属于数据库服务端会话级可变参数,可以设置的值包括: unvdb:采用和PostgreSQL兼容的类型,是该参数的缺省值; oracle:采用和Oracle兼容的类型;
语法
DDL
create,alter,drop,truncate
UDBDT除了支持表、视图、函数、触发器、类型等的DDL语法之外,还支持Oracle存储过程、序列。
| 类型 | 名称 | ORACLE | UDBDT | Postgresql |
|---|---|---|---|---|
| 存储过程 | create procedure | 支持 | 支持 | 支持 |
| alter procedure | 支持 | 支持 | 支持 | |
| drop procedure | 支持 | 支持 | 支持 | |
| 序列 | create sequence | 支持 | 支持 | 支持 |
| alter sequence | 支持 | 支持 | 支持 | |
| drop sequence | 支持 | 支持 | 支持 | |
| seq.nextVal | 支持 | 支持 | 不支持(nextVal('seq')替代) | |
| seq.currVal | 支持 | 支持 | 不支持(currVal('seq')替代) |
DML
insert,update,delete
DQL
select
| SQL查询类型 | 名称 | ORACLE | UDBDT | Postgresql |
|---|---|---|---|---|
| 去重 | distinct | 支持 | 支持 | 支持 |
| unique | 支持 | 不支持 | 不支持 | |
| 分组 | group by | 支持 | 支持 | 支持 |
| 过滤 | having | 支持 | 支持 | 支持 |
| 排序 | order by | 支持 | 支持 | 支持 |
| 递归 | connect by | 支持 | 支持 | 不支持 |
| cte | cte | 支持 | 支持 | 支持 |
| case when | case when | 支持 | 支持 | 支持 |
| 批量insert | insert all into | 支持 | 不支持(insert into values替代) | 不支持(insert into values替代) |
| merge into | merge into | 支持 | 不支持(upsert替代) | 不支持(upsert替代) |
表连接
| 表连接类型 | 表连接名称 | ORACLE | UDBDT | Postgresql |
|---|---|---|---|---|
| 内连接 | (inner) join | 支持 | 支持 | 支持 |
| from tableA,tableB | 支持 | 支持 | 支持 | |
| 左连接 | left (outer) join | 支持 | 支持 | 支持 |
| 右连接 | right (outer) join | 支持 | 支持 | 支持 |
| 全连接 | full (outer) join | 支持 | 支持 | 支持 |
| (+) | (+) | 支持 | 支持 | 不支持 |
DCL
grant,revoke,alter password
TCL
commit,rollback,savepoint
数据类型
UDBDT在Postgresql的基础上新增了一些数据类型,如下:
| ORACLE | UDBDT | Postgresql |
|---|---|---|
| varchar2 | varchar2 | varchar |
| char(n) | char(n) | char(n) |
| date(日期) | date(日期) | timestamp(时间日期型)、date(日期)、time(时间) |
| number(n) | number(n) | smallint、int、bigint |
| number(p,n) | number(p,n) | numeric(p,n)(低效)、float(高效) |
| clob | clob | text |
| blob | blob | bytea |
| rownum | rownum | 无 |
| rowid | rowid | ctid |
函数
| 函数类型 | 函数名称 | ORACLE | UDBDT | Postgresql |
|---|---|---|---|---|
| 数值函数 | ABS | 支持 | 支持 | 支持 |
| ACOS | 支持 | 支持 | 支持 | |
| ASIN | 支持 | 支持 | 支持 | |
| ATAN | 支持 | 支持 | 支持 | |
| ATAN2 | 支持 | 支持 | 支持 | |
| BITAND | 支持 | 支持 | 支持 | |
| CEIL | 支持 | 支持 | 支持 | |
| COS | 支持 | 支持 | 支持 | |
| COSH | 支持 | 支持 | 支持 | |
| EXP | 支持 | 支持 | 支持 | |
| FLOOR | 支持 | 支持 | 支持 | |
| LN | 支持 | 支持 | 支持 | |
| LOG | 支持 | 支持 | 支持 | |
| MOD | 支持 | 支持 | 支持 | |
| NANVL | 支持 | 支持 | 扩展支持 | |
| POWER | 支持 | 支持 | 支持 | |
| ROUND (number) | 支持 | 支持 | 支持 | |
| SIGN | 支持 | 支持 | 支持 | |
| SIN | 支持 | 支持 | 支持 | |
| SINH | 支持 | 支持 | 支持 | |
| SQRT | 支持 | 支持 | 支持 | |
| TAN | 支持 | 支持 | 支持 | |
| TANH | 支持 | 支持 | 支持 | |
| TRUNC (number) | 支持 | 支持 | 支持 | |
| 字符函数 | CHR | 支持 | 支持 | 支持 |
| CONCAT | 支持 | 支持 | 支持 | |
| INITCAP | 支持 | 支持 | 支持 | |
| LOWER | 支持 | 支持 | 支持 | |
| LPAD | 支持 | 支持 | 支持 | |
| LTRIM | 支持 | 支持 | 支持 | |
| REGEXP_REPLACE | 支持 | 支持 | 支持 | |
| REGEXP_SUBSTR | 支持 | 支持 | 支持 | |
| REPLACE | 支持 | 支持 | 支持 | |
| RPAD | 支持 | 支持 | 支持 | |
| RTRIM | 支持 | 支持 | 支持 | |
| SUBSTR | 支持 | 支持 | 支持 | |
| TRANSLATE | 支持 | 支持 | 支持 | |
| TREAT | 支持 | 不支持 | 不支持 | |
| TRIM | 支持 | 支持 | 支持 | |
| UPPER | 支持 | 支持 | 支持 | |
| ASCII | 支持 | 支持 | 支持 | |
| INSTR | 支持 | 支持 | 扩展支持 | |
| LENGTH | 支持 | 支持 | 支持 | |
| REGEXP_INSTR | 支持 | 支持 | 支持 | |
| REVERSE | 支持 | 支持 | 支持 | |
| 日期函数 | ADD_MONTHS | 支持 | 支持 | 扩展支持 |
| CURRENT_DATE | 支持 | 支持 | 支持 | |
| CURRENT_TIMESTAMP | 支持 | 支持 | 支持 | |
| EXTRACT (datetime) | 支持 | 支持 | 支持 | |
| LAST_DAY | 支持 | 支持 | 扩展支持 | |
| LOCALTIMESTAMP | 支持 | 不支持(作为关键字) | 不支持(作为关键字) | |
| MONTHS_BETWEEN | 支持 | 支持 | 扩展支持 | |
| NEW_TIME | 支持 | 支持 | 不支持 | |
| NEXT_DAY | 支持 | 支持 | 扩展支持 | |
| ROUND (date) | 支持 | 支持 | 不支持 | |
| SYSDATE | 支持 | 支持 | 不支持 | |
| SYSTIMESTAMP | 支持 | 支持 | 不支持 | |
| TO_CHAR (datetime) | 支持 | 支持 | 支持 | |
| TO_TIMESTAMP | 支持 | 支持 | 支持 | |
| TRUNC (date) | 支持 | 支持 | 不支持 | |
| 编码解码函数 | DECODE | 支持 | 支持 | 扩展支持 |
| DUMP | 支持 | 支持 | 扩展支持 | |
| 空值比较函数 | COALESCE | 支持 | 支持 | 支持 |
| LNNVL | 支持 | 支持 | 扩展支持 | |
| NANVL | 支持 | 支持 | 扩展支持 | |
| NULLIF | 支持 | 支持 | 支持 | |
| NVL | 支持 | 支持 | 扩展支持 | |
| NVL2 | 支持 | 支持 | 扩展支持 | |
| 通用数值比较函数 | GREATEST | 支持 | 支持 | 支持 |
| LEAST | 支持 | 支持 | 支持 | |
| 类型转换函数 | CAST | 支持 | 支持 | 支持 |
| CONVERT | 支持 | 支持 | 支持 | |
| TO_CHAR (character) | 支持 | 支持 | 支持 | |
| TO_CHAR (datetime) | 支持 | 支持 | 支持 | |
| TO_CHAR (number) | 支持 | 支持 | 支持 | |
| TO_DATE | 支持 | 支持 | 支持 | |
| TO_NUMBER | 支持 | 支持 | 支持 | |
| TO_TIMESTAMP | 支持 | 支持 | 支持 | |
| 分析函数 | AVG * | 支持 | 支持 | 支持 |
| COUNT * | 支持 | 支持 | 支持 | |
| DENSE_RANK | 支持 | 支持 | 支持 | |
| FIRST | 支持 | 不支持 | 不支持 | |
| FIRST_VALUE * | 支持 | 支持 | 支持 | |
| LAG | 支持 | 支持 | 支持 | |
| LAST | 支持 | 不支持 | 不支持 | |
| LAST_VALUE * | 支持 | 支持 | 支持 | |
| LEAD | 支持 | 支持 | 支持 | |
| MAX * | 支持 | 支持 | 支持 | |
| MIN * | 支持 | 支持 | 支持 | |
| RANK | 支持 | 支持 | 支持 | |
| ROW_NUMBER | 支持 | 支持 | 支持 | |
| SUM * | 支持 | 支持 | 支持 |
SQL运算符
| SQL运算符类型 | 运算符名称 | ORACLE | UDBDT | Postgresql |
|---|---|---|---|---|
| 算数运算符 | + | 支持 | 支持 | 支持 |
| - | 支持 | 支持 | 支持 | |
| * | 支持 | 支持 | 支持 | |
| / | 支持 | 支持 | 支持 | |
| 逻辑运算符 | and | 支持 | 支持 | 支持 |
| or | 支持 | 支持 | 支持 | |
| not | 支持 | 支持 | 支持 | |
| 比较运算符 | != | 支持 | 支持 | 支持 |
| <> | 支持 | 支持 | 支持 | |
| ^= | 支持 | 不支持 | 不支持 | |
| = | 支持 | 支持 | 支持 | |
| < | 支持 | 支持 | 支持 | |
| > | 支持 | 支持 | 支持 | |
| <= | 支持 | 支持 | 支持 | |
| >= | 支持 | 支持 | 支持 | |
| is (not) null | 支持 | 支持 | 支持 | |
| (not) between and | 支持 | 支持 | 支持 | |
| (not)in | 支持 | 支持 | 支持 | |
| all/any | 支持 | 支持 | 支持 | |
| exists | 支持 | 支持 | 支持 | |
| like | 支持 | 支持 | 支持 | |
| 连接运算符 | || | 支持 | 支持 | 支持 |
| 合并运算符 | union (all) | 支持 | 支持 | 支持 |
| minus | 支持 | 支持 | 不支持(except代替) | |
| intersect | 支持 | 不支持 | 支持 |
其他
| 类型 | 名称 | ORACLE | UDBDT | Postgresql |
|---|---|---|---|---|
| 过程语言 | declare | 支持 | 支持 | 支持 |
| exception | 支持 | 支持 | 支持 | |
| cursor | 支持 | 支持 | 支持 | |
| 数据类型隐式转换 | 隐式转换 | 支持 | 支持 | 支持 |
| oracle别名 | oracle别名 | 支持 | 支持 | 不支持 |
| 类型复制 | %type | 支持 | 支持 | 支持 |
| %rowtype | 支持 | 支持 | 支持 | |
| like通配符 | _ | 支持 | 支持 | 支持 |
| dual虚拟表 | dual | 支持 | 支持 | 不支持 |
存储过程
UDBDT兼容Oracle的存储过程,当前版本在执行Oracle侧的存储过程创建语句需要在psql 中,并打开PLSQL_MODE参数,如下所示:
创建测试表:create table test (id int,bt date);

set grammar to oracle;
\set PLSQL_MODE  on
CREATE OR REPLACE PROCEDURE test_proc()
AS
N_NUM integer :=1;
BEGIN
    FOR I IN 1..10 LOOP
        INSERT INTO test VALUES(I,SYSDATE);
    END LOOP;
END;
/
\set PLSQL_MODE  off
游标变量作为存储过程的返回值
1. 创建测试表
create table test_table_cursor1(id int,create_time timestamp);

2. 创建存储过程
set grammar to oracle;
\set PLSQL_MODE on
CREATE OR REPLACE PROCEDURE test_proc_cursor1 (V_COUNT   INT,
                                                -- RESULT_OUT   OUT PKG_RETURN_LIST.LIST_CURSOR
                                                RESULT_OUT  OUT refcursor) is
  v_errcode    integer;
  v_errmsg     varchar2(1024);
begin
  INSERT INTO test_table_cursor1(id,create_time)
    select id,sysdate from generate_series(1,V_COUNT) id;

  OPEN RESULT_OUT FOR
      select * from test_table_cursor1 t order by t.id;

end test_proc_cursor1;

/
\set PLSQL_MODE off

3. 使用
unvdb=# begin;
BEGIN
unvdb=# select * from test_table_cursor1;
 ID | CREATE_TIME
----+-------------
(0 rows)

unvdb=# select test_proc_cursor1(5);   -- 要在事务内获取游标的内容,Java中使用也是同理
 TEST_PROC_CURSOR1
--------------------
 <unnamed portal 1>
(1 row)

unvdb=# select * from test_table_cursor1;
 ID |        CREATE_TIME
----+----------------------------
  3 | 2024-02-28 11:58:09
  5 | 2024-02-28 11:58:09
  1 | 2024-02-28 11:58:09
  4 | 2024-02-28 11:58:09
  2 | 2024-02-28 11:58:09
(5 rows)

unvdb=# FETCH all in "<unnamed portal 1>";
 ID |        CREATE_TIME
----+----------------------------
  1 | 2024-02-28 11:58:09
  2 | 2024-02-28 11:58:09
  3 | 2024-02-28 11:58:09
  4 | 2024-02-28 11:58:09
  5 | 2024-02-28 11:58:09
(5 rows)

unvdb=# select * from test_table_cursor1;
 ID |        CREATE_TIME
----+----------------------------
  3 | 2024-02-28 11:58:09
  5 | 2024-02-28 11:58:09
  1 | 2024-02-28 11:58:09
  4 | 2024-02-28 11:58:09
  2 | 2024-02-28 11:58:09
(5 rows)

unvdb=# end;
COMMIT
unvdb=# select * from test_table_cursor1;
 ID |        CREATE_TIME
----+----------------------------
  3 | 2024-02-28 11:58:09
  5 | 2024-02-28 11:58:09
  1 | 2024-02-28 11:58:09
  4 | 2024-02-28 11:58:09
  2 | 2024-02-28 11:58:09
(5 rows)

unvdb=# FETCH all in "<unnamed portal 1>";
ERROR:  cursor "<unnamed portal 1>" does not exist
存储过程内部使用游标
1. 创建测试表和测试数据
create table test_table_cursor2(id int,create_time timestamp);
insert into test_table_cursor2 select id,sysdate from generate_series(1,10) id;

2. 创建存储过程
set grammar to oracle;
\set PLSQL_MODE on
CREATE OR REPLACE PROCEDURE test_proc_cursor2()
AS
CURSOR cursor_bp_item IS
        SELECT DISTINCT id,create_time from test_table_cursor2 order by id;
BEGIN
    FOR bp_item IN cursor_bp_item LOOP
        dbms_output.put_line('id:' || bp_item.id ||
                             ',create_time:' || bp_item.create_time);
    END LOOP;

END test_proc_cursor2;

/
\set PLSQL_MODE off

3. 使用
unvdb=# begin;
BEGIN
unvdb=# SELECT DISTINCT id,create_time from test_table_cursor2 order by id;
 ID |        CREATE_TIME
----+----------------------------
  1 | 2024-02-28 14:15:49
  2 | 2024-02-28 14:15:49
  3 | 2024-02-28 14:15:49
  4 | 2024-02-28 14:15:49
  5 | 2024-02-28 14:15:49
  6 | 2024-02-28 14:15:49
  7 | 2024-02-28 14:15:49
  8 | 2024-02-28 14:15:49
  9 | 2024-02-28 14:15:49
 10 | 2024-02-28 14:15:49
(10 rows)

unvdb=# select test_proc_cursor2();
NOTICE:  id:1,create_time:2024-02-28 14:15:49
NOTICE:  id:2,create_time:2024-02-28 14:15:49
NOTICE:  id:3,create_time:2024-02-28 14:15:49
NOTICE:  id:4,create_time:2024-02-28 14:15:49
NOTICE:  id:5,create_time:2024-02-28 14:15:49
NOTICE:  id:6,create_time:2024-02-28 14:15:49
NOTICE:  id:7,create_time:2024-02-28 14:15:49
NOTICE:  id:8,create_time:2024-02-28 14:15:49
NOTICE:  id:9,create_time:2024-02-28 14:15:49
NOTICE:  id:10,create_time:2024-02-28 14:15:49
 TEST_PROC_CURSOR2
-------------------

(1 row)

unvdb=# end;
COMMIT
unvdb=# select test_proc_cursor2();
NOTICE:  id:1,create_time:2024-02-28 14:15:49
NOTICE:  id:2,create_time:2024-02-28 14:15:49
NOTICE:  id:3,create_time:2024-02-28 14:15:49
NOTICE:  id:4,create_time:2024-02-28 14:15:49
NOTICE:  id:5,create_time:2024-02-28 14:15:49
NOTICE:  id:6,create_time:2024-02-28 14:15:49
NOTICE:  id:7,create_time:2024-02-28 14:15:49
NOTICE:  id:8,create_time:2024-02-28 14:15:49
NOTICE:  id:9,create_time:2024-02-28 14:15:49
NOTICE:  id:10,create_time:2024-02-28 14:15:49
 TEST_PROC_CURSOR2
-------------------

(1 row)

unvdb=# SELECT DISTINCT id,create_time from test_table_cursor2 order by id;
 ID |        CREATE_TIME
----+----------------------------
  1 | 2024-02-28 14:15:49
  2 | 2024-02-28 14:15:49
  3 | 2024-02-28 14:15:49
  4 | 2024-02-28 14:15:49
  5 | 2024-02-28 14:15:49
  6 | 2024-02-28 14:15:49
  7 | 2024-02-28 14:15:49
  8 | 2024-02-28 14:15:49
  9 | 2024-02-28 14:15:49
 10 | 2024-02-28 14:15:49
(10 rows)
在 Java 中调用返回值包含游标类型的存储过程,游标返回值的类型如下:
String callstat = "{ call CIT_SYS_AIEMP_SYNC() }";
CallableStatement cs = conn.prepareCall("{"+callstat+"}");
cs.registerOutParameter(4, Types.OTHER);
动态sql的使用
1. 创建测试表和数据
create table test_table3(id int,score int);
insert into test_table3 values(1,100),(2,98),(2,98),(3,98),(4,98),(5,99);
create table test_table3_2(id int,cnt int,current_score int);

2. 创建存储过程
set grammar to oracle;
\set PLSQL_MODE on
CREATE OR REPLACE PROCEDURE test_proc3()
AS
V_FINAL_ID int;
V_FINAL_COUNT int;
V_INPUT int;
V_BASIC_SQL varchar(1000);
BEGIN
    V_BASIC_SQL :='select id,count(*) from test_table3 where score = $1 group by id';
    FOR V_INPUT1 IN (SELECT score FROM test_table3 group by 1) LOOP
        V_INPUT := V_INPUT1.score;
    	EXECUTE IMMEDIATE V_BASIC_SQL into V_FINAL_ID,V_FINAL_COUNT using V_INPUT;
    	INSERT INTO test_table3_2
    		VALUES (V_FINAL_ID,V_FINAL_COUNT,V_INPUT);
    END LOOP;
END test_proc3;

/
\set PLSQL_MODE off

3. 使用
unvdb=# select * from test_table3_2;
 ID | CNT | CURRENT_SCORE
----+-----+---------------
(0 rows)

unvdb=# select test_proc3();
 TEST_PROC3
-------------------

(1 row)

unvdb=# select * from test_table3_2;
 ID | CNT | CURRENT_SCORE
----+-----+---------------
  5 |   1 |            99
  1 |   1 |           100
  2 |   2 |            98
(3 rows)
Oracle 存储过程兼容总结
tips
函数中使用Oracle语法的,建议使用Oracle语法兼容模式创建
修改的过程中保留原始SQL的注释
type 定义
原始SQL:
type t_record is record(
  id number,
  value number
);
  TYPE t_table IS TABLE OF t_record INDEX BY BINARY_INTEGER;
  TYPE num_table IS TABLE OF number INDEX BY BINARY_INTEGER;
  task_status_table t_table;
  task_status_map num_table;

  bugstatustrend_records bug_status_trend_table  := bug_status_trend_table();
替换SQL:
create type t_record as (
  id numeric,
  value numeric
);

TYPE t_table IS TABLE OF t_record ;
  TYPE num_table IS TABLE OF number ;
  task_status_table t_table;
  task_status_map num_table;

bugstatustrend_records bug_status_trend_table  ;
有些type在不同的Oracle存储过程中是重名的,修改的时候要注意type命名保证唯一;
数组使用
原始SQL:
task_status_map(task_status_table(i).id) := task_status_table(i).value;
替换SQL:
task_status_map(task_status_table[i].id) := task_status_table[i].value;
游标返回
RESULT_OUT OUT PKG_RETURN_LIST.LIST_CURSOR
原始SQL:
作为返回值定义:
RESULT_OUT  OUT PKG_RETURN_LIST.LIST_CURSOR
替换SQL:
RESULT_OUT OUT refcursor
绑定变量
函数或者存储过程中,execute immediate SQL using param1,param2 中使用了绑定变量。
原始SQL:
and tn.fnode_id = :node_id
替换SQL:
and tn.fnode_id = $1
$后面的数字,根据在SQL在中的顺序,进行指定。
从事务中获取游标返回值结果:
begin;
select AP_LAST_FREEZING_REVIEW('2023','12','120P9008');

FETCH all in "<unnamed portal 1>";
rollback;
删除临时表
如果在存储过程的开始部分看到有如下语句:
DELETE FROM analysis_temp3;
在Oracle环境中检查下analysis_temp3 是否是全局的临时表:
create global temporary table ANALYSIS_TEMP3
如果是,则在执行delete之前创建下unvdb下的临时表:
execute immediate '/*unvdb*/create temporary table IF NOT EXISTS analysis_temp2 (like analysis_temp2 INCLUDING all) ';
适用于对表分区键不敏感的操作,如果从性能考虑且对分区键值敏感建议先创建好临时表,然后再执行相关操作(先delete表再insert插入数据);
并检查ANALYSIS_TEMP3 在UDBDT中是否已经创建:
\d ANALYSIS_TEMP3
merge into用法
merge into when matched then…when not matched then … 函数或者存储过程中使用merge into 语法,分为两种: 一种只使用when matched; 一种既用到when matched又用到when not matched
针对只使用when matched,可以使用update … from … where …方式替换
   merge into sys_bp_pro_update a
   using taskplan t
   on (a.pro_code = t.projectcode)
   when matched then
     update set a.pro_id = t.id;
  --转换成unvdb语法
    update sys_bp_pro_update
    set pro_id = t.id
    FROM
     taskplan t
    WHERE pro_code = t.projectcode;
即用到when matched又用到when not matched,可以使用with … as (update … from … where … returning tablename.* ) insert into … from … where not exists ()语法替换
 merge into test01 a
  using  b on (a.id=b.id)
  when matched then update set a.note=b.note
  when not matched then insert (a.id, a.note) values (b.id, b.note);
 --转换成unvdb语法
  WITH upsert as
(update test01  set note=b.note from b where id= b.id
  RETURNING test01.*
)
insert into test01 select * from b  where not exists(select 1 from upsert m where m.id=b.id);
select into数组中的一列
sql如下:
select count (tn.id) into bugstatustrend_records[lv_count_t].fixing_count
修改为:
需要有个中间变量来进行转移:
v_tmp_cnt integer;

select  count (tn.id)  into v_tmp_cnt;
select v_tmp_cnt into  bugstatustrend_records[lv_count_t].fixing_count;
高可用
最新版本的UDBDT中,高可用由自愈模块自动完成,用户无需关注,因此本章节内容仅为用户手动执行的时候作为参考。
涉及到主备切换的命令有3个,分别是failover、rewind、switchover,应用不同的场景。
备升主,主移除
当主节点down了之后,通过failover命令实现datanode、coordinator、gtmcoord节点的主备切换。
unvdb=# failover datanode dn1_1;
WARNING:  An exception occurred during the switching operation, It is recommended to use command such as 'monitor all', 'monitor ha' to check the failure point in the cluster first, and then retry the switching operation!!!
ERROR:  Can't find a Synchronous standby node, Abort switching to avoid data loss
unvdb=# failover datanode dn1_1 force;
NOTICE:  stop datanode master dn1_1 fast.
NOTICE:  dn1_2 have the best wal lsn, choose it as a candidate for promotion
NOTICE:  gc1 try lock cluster successfully
NOTICE:  promote dn1_2 /home/tom/udbtx/data/dn1_2 successfully
NOTICE:  dn1_2 running on correct status of master mode
NOTICE:  dn1_1 has been kicked out of the cluster
NOTICE:  gc1 try unlock cluster successfully
NOTICE:  Switch the datanode master from dn1_1 to dn1_2 has been successfully completed
 nodename | status |        description
----------+--------+---------------------------
 dn1_2    | t      | failover datanode success
(1 row)
从操作中可以看到,如果master节点没有同步slave存在,则不允许进行failover操作,否则会造成数据丢失,需要使用force选项来进行强制切换。
主备切换
当用户需要将原主机切换被备机,原备机切换为主机,可以使用switchover命令:
unvdb=# switchover datanode slave dn1_1;
NOTICE:  wait max 10 seconds to wait there are no active connections on coordinators and master nodes
NOTICE:  gc1 try lock cluster successfully
NOTICE:  wait max 10 seconds to check there are no active locks in pg_locks except the locks on pg_locks table
NOTICE:  wait max 10 seconds to check dn1_2 and dn1_1 have the same xlog position
NOTICE:  stop datanode master dn1_2 fast.
NOTICE:  promote dn1_1 /home/tom/udbtx/data/dn1_1 successfully
NOTICE:  dn1_1 running on correct status of master mode
NOTICE:  stop datanode master dn1_2 fast.
NOTICE:  call agent start datanode master dn1_2 /home/tom/udbtx/data/dn1_2 successfully
NOTICE:  dn1_2 running on correct status of slave mode
NOTICE:  dn1_2 has followed dn1_1 success
NOTICE:  gc1 try unlock cluster successfully
NOTICE:  Switch the datanode master from dn1_2 to dn1_1 has been successfully completed
 nodename | status |         description
----------+--------+-----------------------------
 dn1_1    | t      | switchover datanode success
(1 row)

unvdb=# list node dn1_1;
 name  | host  |      type       | mastername | port  | sync_state |               path               | initialized | incluster | readonly | zone
-------+-------+-----------------+------------+-------+------------+----------------------------------+-------------+-----------+----------+-------
 dn1_1 | host01 | datanode master |            | 19431 |            | /home/tom/udbtx/data/dn1_1 | t           | t         | f        | local
(1 row)

unvdb=# list node dn1_2;
 name  | host  |      type      | mastername | port  | sync_state |               path               | initialized | incluster | readonly | zone
-------+-------+----------------+------------+-------+------------+----------------------------------+-------------+-----------+----------+-------
 dn1_2 | host02 | datanode slave | dn1_1      | 19431 | sync       | /home/tom/udbtx/data/dn1_2 | t           | t         | f        | local
(1 row)
可以看到,主备之间发生了切换。
快速恢复备节点
如果master出现故障,执行了failover命令,slave升级为master后,用户想给新master重新添加新slave时,可以有两个选择:
方法一:使用append命令添加一个全新的slave节点,需要进行数据同步,保证主备一致;
方法二:将原来移除的master以slave节点的形式加入到集群中。
第二种方式由于原master节点已经有大量的数据,重新加入到集群中后只需要进行少量的数据同步即可,时间短。rewind的功能正是如此,可以实现快速恢复备节点。具体可以参考 rewind 章节。
注意:要使用rewind功能,需要在datanode上将wal_log_hints和full_page_writes设置为on。
set datanode all(wal_log_hints=on, full_page_writes=on);
rewind datanode slave dm1;
举例:
unvdb=# add datanode slave dn1_1 for dn1_2 (host=host01,port=19431,path='/home/tom/udbtx/data/dn1_1');
ADD NODE
unvdb=# rewind datanode slave dn1_1;
NOTICE:  ud_ctl restart datanode slave "dn1_1"
NOTICE:  [SUCCESS] host(192.168.0.11) cmd(RESTART DATANODE) params( restart -D /home/tom/udbtx/data/dn1_1 -Z datanode -m fast -o -i -w -c -l /home/tom/udbtx/data/dn1_1/logfile).
NOTICE:  wait max 90 seconds to check datanode slave "dn1_1" running normal
NOTICE:  ud_ctl stop datanode slave "dn1_1" with fast mode
NOTICE:  [SUCCESS] host(192.168.0.11) cmd(STOP DATANODE) params( stop -D /home/tom/udbtx/data/dn1_1 -Z datanode -m fast -o -i -w -c).
NOTICE:  wait max 90 seconds to check datanode slave "dn1_1" stop complete
NOTICE:  update gtmcoord slave "gc2" ud_hba.conf for the rewind node dn1_1
NOTICE:  update datanode master "dn1_2" ud_hba.conf for the rewind node dn1_1
NOTICE:  update gtmcoord master "gc1" ud_hba.conf for the rewind node dn1_1
NOTICE:  on datanode master "dn1_2" execute "checkpoint"
NOTICE:  receive msg: {"result":"0/0"}
NOTICE:  receive msg: {"result":"0"}
NOTICE:  receive msg:
NOTICE:  refresh mastername of datanode slave "dn1_1" in the node table
NOTICE:  set parameters in unvdbsvr.conf of datanode slave "dn1_1"
NOTICE:  refresh unvdbsvr.conf of datanode slave "dn1_1"
NOTICE:  ud_ctl  start -Z datanode -D /home/tom/udbtx/data/dn1_1 -o -i -w -c -l /home/tom/udbtx/data/dn1_1/logfile
NOTICE:  refresh datanode master "dn1_2" synchronous_standby_names='dn1_1'
 mgr_failover_manual_rewind_func
---------------------------------
 t
(1 row)

unvdb=# list node dn1_2;
 name  | host  |      type       | mastername | port  | sync_state |                 path                  | initialized | incluster | zone
-------+-------+-----------------+------------+-------+------------+---------------------------------------+-------------+-----------+-------
 dn1_2 | host02 | datanode master |            | 19431 |            | /home/tom/udbtx/data/dn1_2 | t           | t         | local
(1 row)

unvdb=# list node dn1_1;
 name  | host  |      type      | mastername | port  | sync_state |                 path                  | initialized | incluster | zone
-------+-------+----------------+------------+-------+------------+---------------------------------------+-------------+-----------+-------
 dn1_1 | host01 | datanode slave | dn1_2      | 19431 | sync       | /home/tom/udbtx/data/dn1_1 | t           | t         | local
(1 row)
数据备份和恢复
利用barman实现数据备份和恢复,UDBDT团队对barman做了部分优化,增强了barman的功能。
可实现的功能包括:
归档管理
全量备份
增量备份
设置备份策略
本地备份
远程备份
压缩备份
全局一致性恢复
远程恢复
使用的时候需要确认:
barman所在主机到需要备份节点所在主机 ssh 免密
需要备份节点所在主机到barman所在主机 ssh 免密
各个节点的归档模式需要打开
各个节点的
wal log需要归档到barman所在主机,并由barman管理。
barman的官方文档:https://docs.pgbarman.org/release/3.9.0/
创建barrier
在集群版中,UDBDT通过barrier技术来实现全局一致性的恢复,因此需要定期在集群中创建barrier,以便恢复的时候可以选择barrier id进行恢复。 建议通过crontab的方式,在集群中每分钟创建一个barrier,创建barrier的操作不会对集群造成任何压力。
连接coordinator或者gtmcoord创建barrier:
unvdb=# create barrier '2023_12_26_15_00';
CLUSTER BARRIER
创建barrier 的定时脚本,每分钟执行一次:
#!/bin/bash
# * * * * *  sh create_barrier.sh >> /data/unvdb/hostmon/log/create_barrier.log 2>&1

source /home/tom/.bashrc

barrier_id=`date "+%Y_%m_%d_%H_%M" `
coordhost="192.168.0.211"
coordport="17432"
dbname="unvdb"
psqlconn="ud_sql -d $dbname -h $coordhost -p $coordport"

$psqlconn -c "create barrier '$barrier_id';"
if [ `echo $?` -eq 0 ]; then
  echo `date "+%Y-%m-%d %H:%M:%S" ` "create barrier $barrier_id succuessed"
else
  echo `date "+%Y-%m-%d %H:%M:%S" ` "create barrier $barrier_id failed"
fi
脚本中变量coordhost/coordport/dbname需要根据实际情况修改。
安装udbarman依赖
首先必须安装ud_sql客户端。
在可连接外网的主机上通过pip 下载barman的依赖到本地文件夹并打包:
pip download -d /tmp/barman barman
pip download -d /tmp/barman argcomplete
tar zcvf barman.tar.gz barman
将pip、setuptools、barman的打包文件上传到离线环境,解压后安装:
源码安装pip、setuptools
tar zxvf barman.tar.gz
tar zxvf pip-19.3.1.tar.gz
unzip setuptools-42.0.2.zip
cd pip-19.3.1 &&  sudo python setup.py install
cd ..
cd setuptools-42.0.2  &&  sudo python setup.py install
cd ..
通过pip离线安装barman的依赖:
sudo pip install --no-index --ignore-installed  --find-links=barman barman
sudo pip install --no-index --ignore-installed  --find-links=barman argcomplete
--find-links指定 barman打包文件解压后的路径。
文件备用地址:请联系UDBDT技术支持人员。
源码安装udbarman
下载地址:请联系UDBDT技术支持人员。
安装barman到当前用户:
unzip udbarman-master.zip
cd udbarman-master
./setup.py install --user
...
Installing barman script to /home/tom/.local/bin
...
配置环境变量:
将 $HOME/.local/bin加载到$PATH环境变量中。
export PATH=$UDBHOME/bin:$HOME/.local/bin$PATH:$HOME/bin:
检查barman的路径:
[tom@host05 ~/barman]$ which barman
~/.local/bin/barman
barman配置
barman的配置文件分为两个:
一个是全局的: 全局相关一些参数可以在这个文件中配置,路径为:
~/.barman.conf一个是节点的 节点相关的个性化参数可以在这个文件中配置,路径在全局配置的参数目录中。
在barman所在主机上规划好barman使用的目录,示例中假设备份数据存放挂载点为/data/backup。
创建相关目录
mkdir -p /data/backup/udbtx/barman/{bin,conf,log,data}
conf 存放每个备份节点的配置文件
data 存放备份的数据
log 存放备份日志
bin 存放备份恢复用到的脚本
全局配置文件
配置文件的详细参数说明可以参考源码目录中的
udbarman-master/doc/barman.conf文件说明。
vi ~/.barman.conf
[barman]
barman_user = tom
configuration_files_directory = /data/backup/udbtx/barman/conf/
barman_home = /data/backup/udbtx/barman/data/
log_file = /data/backup/udbtx/barman/log/barman.log
compression = gzip
parallel_jobs =3
minimum_redundancy = 1
retention_policy = RECOVERY WINDOW OF 1 WEEKS
reuse_backup = link
需要根据实际情况修改如下参数:
barman_user barman 程序的运行用户
configuration_files_directory 节点配置文件的存放目录
barman_home 节点备份数据的存放目录
log_file barman 程序运行的主日志文件
minimum_redundancy 最小保留的备份数量
retention_policy 备份数据的保留策略
reuse_backup 仅仅rsync方式的时候才配置
备份节点的配置文件
通常情况下,需要对集群中的coordinator master、gtmcoord master、datanode master节点进行备份,配置文件示例如下:
backup_method为rsync方式典型配置:
[tom@host05 conf]$ cat dn1_1.conf
[dn1_1]
description =  "datanode master  dn1_1"
ssh_command = ssh tom@192.168.0.211 -q
conninfo = host=192.168.0.211 port=19431 user=tom dbname=unvdb
backup_method = rsync
backup_options = exclusive_backup
parallel_jobs = 3
archiver = on
archiver_batch_size = 50

backup_method为unvdb方式(流复制)典型配置:
[tom@host05 conf]$ cat dn1_1.conf
[dn1_1]
description =  "datanode master  dn1_1"
ssh_command = ssh tom@192.168.0.211 -q
conninfo = host=192.168.0.211 port=19431 user=tom dbname=unvdb
streaming_conninfo = host=192.168.0.211 port=19431 user=tom
backup_method = unvdb
backup_options = concurrent_backup
parallel_jobs = 3
streaming_archiver = on
streaming_archiver_batch_size = 50
slot_name = barman_dn1_1
建议配置文件的文件名、文件内容中的[]标识、udbmgr中的nodename均保持一致,方便识别。
如果使用集群版本,因节点较多,本节后面提供了脚本来批量生成
master节点的配置文件。如果使用单机版本,则直接编辑节点配置文件即可。
相同的参数,节点配置会覆盖全局配置。
检查节点配置
通过barman check nodename检查节点的配置文件后,会在barman的数据目录下生产以节点名称命名的文件夹:
[tom@host05 data]$ barman check dn1_1
Server dn1_1:
        Udbtx: OK
        superuser or standard user with backup privileges: OK
        wal_level: OK
        directories: OK
        retention policy settings: OK
        backup maximum age: OK (no last_backup_maximum_age provided)
        backup minimum size: OK (0 B)
        wal maximum age: OK (no last_wal_maximum_age provided)
        wal size: OK (0 B)
        compression settings: OK
        failed backups: OK (there are 0 failed backups)
        minimum redundancy requirements: OK (have 0 backups, expected at least 0)
        ssh: OK (Udbtx server)
        not in recovery: OK
        exclusive backup supported: OK
        systemid coherence: OK (no system Id stored on disk)
        archive_mode: OK
        archive_command: OK
        continuous archiving: OK
        archiver errors: OK
[tom@host05 data]$ ll dn1_1
total 24
drwxrwxr-x 3 tom tom 4096 Dec 25 14:21 base
drwxrwxr-x 2 tom tom 4096 Dec 25 14:21 errors
-rw-rw-r-- 1 tom tom   61 Dec 25 14:21 identity.json
drwxrwxr-x 2 tom tom 4096 Dec 25 14:21 incoming
drwxrwxr-x 2 tom tom 4096 Dec 25 14:21 streaming
drwxrwxr-x 3 tom tom 4096 Dec 25 14:21 wals
[tom@host05 data]$
集群版本中,节点较多,可以用barman check all 进行全部节点的检查。
设置归档命令
增量备份需要使用归档文件,使用barman进行备份管理的话,就需要将各个节点的归档文件交给barman管理。
先获取节点的incoming目录:
[tom@host05 conf]$ barman show-server dn1_1 |grep incoming_wals_directory
        incoming_wals_directory: /data/backup/udbtx/barman/data//dn1_1/incoming
设置节点的归档命令
在设置归档命令之前,先确保节点的归档模式已经打开。
单机版本 管理员用户登录数据库,执行如下命令:
alter system set archive_command='rsync -a %p tom@192.168.0.80:/data/backup/udbtx/barman/data/dn1_1/incoming/%f';
select pg_reload_conf();
集群版本 登录
udbmgr修改archive_command:
set datanode master dn1_1(archive_command='rsync -a %p tom@192.168.0.80:/data/backup/udbtx/barman/data/dn1_1/incoming/%f');
按照上面的步骤继续配置其他节点。
如果使用集群版本,因节点较多,本节后面提供了脚本来批量设置节点的归档命令。
检查节点的归档命令:
unvdb=# show param dn1_1 archive_command;
             type              | status |                                              message
-------------------------------+--------+---------------------------------------------------------------------------------------------------
 datanode master dn1_1 | t      | archive_command = rsync -a %p tom@192.168.0.80:/data/backup/udbtx/barman/data/dn1_1/incoming/%f
 datanode slave dn1_2  | t      | archive_command = rsync -a %p tom@192.168.0.80:/data/backup/udbtx/barman/data/dn1_2/incoming/%f
(2 rows)
生成所有master节点配置文件
配置好脚本中的相关参数后,执行 sh udbarman_operate_distrib.sh generate_config 生成所有master节点的配置文件。执行完成后,到配置文件目录检查。
设置所有master节点的归档命令
配置文件检查无误后,执行 sh udbarman_operate_distrib.sh set_archive_cmd 设置所有master节点的归档命令。执行完成后,登录udbmgr,执行 show param nodename archive_command 检查节点的归档命令设置是否正确。
强制日志切换
配置完成后,通过barman执行一次切换日志操作,确保节点可以正确归档:
barman switch-wal --force --archive dn1_1
集群版本中,节点较多,可以用barman switch-wal --force --archive all 进行全部节点的日志切换。
barman 配置脚本
为了方便分布式操作,我们提供了脚本udbarman_operate_distrib.sh,里面把一些重复的操作使用脚本来操作,里面一些目录/配置等供参考,用户可以自行根据实际情况更改,有一些barman操作可以使用barman本身的命令来执行,也可以使用脚本中提供的功能,比如备份集群所有master节点,可以使用barman backup all,也可以使用脚本sh udbarman_operate_distrib.sh backup_all。 [tom@host05 ~]$ ./udbarman_operate_distrib.sh –help usage: sh ./udbarman_operate_distrib.sh set_hba_trust|generate_config_rsync|generate_config_unvdb|create_slot|receive_wal|set_archive_cmd|backup_all|recover_remote|recover_local|switch_recover_data|delete_recovery_signal set_hba_trust : 将设置所有主节点的ud_hba.conf的trust命令 generate_config_rsync : rsync方式生成 barman 配置文件 generate_config_unvdb : unvdb方式生成 barman 配置文件 create_slot : 创建slot receive_wal : 启动接受wal进程 set_archive_cmd : 设置所有节点的归档命令 backup_all : 备份所有节点的数据 recover_remote : 将所有主节点的指定备份恢复到各个节点的当前目录下 recover_local : 将所有主节点的指定备份恢复到barman机器的指定目录下 switch_recover_data : 将所有主节点的恢复节点替换原节点 delete_recovery_signal: 将所有主节点恢复后删除recovery.signal文件
sh udbarman_operate_distrib.sh set_hba_trust:
add hba $nodetype $nodename(”host all all 192.168.0.0 16 trust”);
这个需要根据实际情况进行修改。
sh udbarman_operate_distrib.sh generate_config_rsync:
rsync方式的配置,backup_options等配置根据实际情况修改。
sh udbarman_operate_distrib.sh generate_config_unvdb:
unvdb方式的配置,slot_name等配置根据实际情况修改。
sh udbarman_operate_distrib.sh create_slot:
unvdb方式的时候批量创建复制槽,无需修改。
sh udbarman_operate_distrib.sh receive_wal:
unvdb方式的时候批量启动接受wal进程,无需修改。
sh udbarman_operate_distrib.sh set_archive_cmd:
设置所有节点的归档命令,这个需要根据实际情况进行修改,rsync方式的时候设置archive_mode = on和archive_command;unvdb方式的时候archive_mode = off。
sh udbarman_operate_distrib.sh backup_all:
备份集群所有master节点的数据,这个等同于barman backup all,根据实际情况修改barman backup带的参数。
sh udbarman_operate_distrib.sh recover_remote:
将所有主节点的指定备份恢复到各个节点的当前目录下,nodepath/barrerid/backupid需要根据实际情况修改,nodepath目前脚本中是把数据恢复到各个节点的当前目录下,barrerid为脚本create_barrier.sh创建,backupid为要恢复的备份。
sh udbarman_operate_distrib.sh recover_local:
将所有主节点的指定备份恢复到barman所在的机器上,recover_home/barrerid/backupid需要根据实际情况修改。
sh udbarman_operate_distrib.sh switch_recover_data:
将所有主节点的恢复节点替换原节点,这个命令是执行recover_remote命令后,再执行的该命令,仅供参考,用户需要根据实际的恢复路径来修改,甚至可以手动操作。
sh udbarman_operate_distrib.sh delete_recovery_signal:
将所有主节点恢复后删除recovery.signal文件,目前是将该文件更名,实际可以直接删除,用户可以根据实际情况修改。
注意修改脚本中的如下公共变量:
barman_home
barman_host
barman_user
mgrhost
mgrport
数据备份
备份一个datanode
如果有多个datanode需要备份,则需要分别执行这个命令。如果用户想要后期基于barrier点恢复,则需要在备份前,先登录到任意一个coordinator上,创建barraier。
[tom@host05 ~/barman]$ barman backup cn1
Starting backup using rsync-exclusive method for server cn1 in /data/backup/udbtx/barman/data//cn1/base/20231225T142116
Backup start at LSN: 0/3000028 (000000010000000000000003, 00000028)
This is the first backup for server cn1
WAL segments preceding the current backup have been found:
        000000010000000000000001 from server cn1 has been removed
Starting backup copy via rsync/SSH for 20231225T142116 (3 jobs)
Copy done (time: less than one second)
This is the first backup for server cn1
Asking Udbtx server to finalize the backup.
Backup size: 27.5 MiB. Actual size on disk: 27.5 MiB (-0.00% deduplication ratio).
Backup end at LSN: 0/3000138 (000000010000000000000003, 00000138)
Backup completed (start time: 2023-12-25 14:21:16.622993, elapsed time: 2 seconds)
Processing xlog segments from file archival for cn1
        000000010000000000000002
        000000010000000000000003
        000000010000000000000003.00000028.backup
查看某一节点所有备份数据
[tom@host05 ~/barman]$ barman list-backup dn1_1
dn1_1 20231225T142122 - Mon Dec 25 14:21:23 2023 - Size: 27.5 MiB - WAL Size: 0 B
查看某一个备份的详细信息,其中,20231225T142122是backup_id。
[tom@host05 ~/barman]$ barman show-backup dn1_1 20231225T142122
Backup 20231225T142122:
  Server Name            : dn1_1
  System Id              : 7315362574047591038
  Status                 : DONE
  Udbtx Version          : 130003
  PGDATA directory       : /home/tom/udbtx/data/dn1_1

  Base backup information:
    Disk usage           : 27.5 MiB (27.5 MiB with WALs)
    Incremental size     : 27.5 MiB (-0.00%)
    Timeline             : 1
    Begin WAL            : 000000010000000000000005
    End WAL              : 000000010000000000000005
    WAL number           : 1
    WAL compression ratio: 99.90%
    Begin time           : 2023-12-25 14:21:22.957719+08:00
    End time             : 2023-12-25 14:21:23.987432+08:00
    Copy time            : less than one second
    Estimated throughput : 56.6 MiB/s (3 jobs)
    Begin Offset         : 40
    End Offset           : 312
    Begin LSN            : 0/5000028
    End LSN              : 0/5000138

  WAL information:
    No of files          : 0
    Disk usage           : 0 B
    Last available       : 000000010000000000000005

  Catalog information:
    Retention Policy     : VALID
    Previous Backup      : - (this is the oldest base backup)
    Next Backup          : - (this is the latest base backup)
删除备份
命令:
barman cron
该命令会根据配置文件中的备份保留策略,删除过期、多余的备份。
例子:
[tom@host05 ~]$ barman list-backup dn1_1
dn1_1 20231226T165021 - Tue Dec 26 16:50:22 2023 - Size: 27.5 MiB - WAL Size: 0 B
dn1_1 20231226T164905 - Tue Dec 26 16:49:06 2023 - Size: 27.5 MiB - WAL Size: 32.2 KiB
dn1_1 20231226T164602 - Tue Dec 26 16:46:03 2023 - Size: 27.5 MiB - WAL Size: 32.2 KiB
dn1_1 20231212T163738 - Tue Dec 12 16:37:39 2023 - Size: 27.5 MiB - WAL Size: 32.3 KiB - OBSOLETE
[tom@host05 ~]$ barman cron
Starting WAL archiving for server dn1_1
Enforcing retention policy: removing backup 20231212T163738 for server dn1_1
Deleting backup 20231212T163738 for server dn1_1
Delete associated WAL segments:
000000010000000000000016
000000010000000000000016.00000028.backup
0000000A0000000000000017
Deleted backup 20231212T163738 (start time: Tue Dec 26 19:38:12 2023, elapsed time: less than one second)
[tom@host05 ~]$ barman list-backup dn1_1
dn1_1 20231226T165021 - Tue Dec 26 16:50:22 2023 - Size: 27.5 MiB - WAL Size: 0 B
dn1_1 20231226T164905 - Tue Dec 26 16:49:06 2023 - Size: 27.5 MiB - WAL Size: 32.2 KiB
dn1_1 20231226T164602 - Tue Dec 26 16:46:03 2023 - Size: 27.5 MiB - WAL Size: 32.2 KiB
删除某一个备份
命令:
barman delete server_name backup_id
例子:
[tom@host05 ~]$ barman delete dn1_1 20231226T163738
Deleting backup 20231226T164602 for server dn1_1
Delete associated WAL segments:
        000000010000000000000018
        000000010000000000000018.00000028.backup
        000000010000000000000019
Deleted backup 20231226T164602 (start time: Wed Dec 27 14:14:12 2023, elapsed time: less than one second)
备份所有节点
集群中涉及到的节点较多,建议通过提供的udbarman_operate_distrib.sh脚本操作。
执行 sh udbarman_operate_distrib.sh backup_all 或者执行barman backup all会对所有的master节点发起备份操作。
coordinator和gtmcoord 相对小一些,备份耗时也会较短,datanode 相对耗时会长一些。
通过barman的日志查看节点的备份进度。
数据恢复
恢复到某一个备份id
命令:
barman recover server_name backup_id destination_directory
想了解具体参数意义,可以参考:barman recover --help
例子:
[tom@host05 ~]$ barman recover cn1 20231225T115651 /home/tom/udbtx/data/cn1_recoverdata --remote-ssh-command='ssh tom@192.168.0.211'
Starting remote restore for server cn1 using backup 20231225T115651
Destination directory: /home/tom/udbtx/data/cn1_recoverdata
Copying the base backup.
Copying required WAL segments.
Generating archive status files
Identify dangerous settings in destination directory.

IMPORTANT
These settings have been modified to prevent data losses

unvdbsvr.conf line 875: archive_command = false

Your PostgreSQL server has been successfully prepared for recovery!
要注意最后的提示,恢复完成后,节点的归档命令被关闭了,需要在所有节点恢复完成,数据确认无误,集群开始正式运行后,把所有节点的归档命令重新设置好。
基于时间点的恢复
基于时间点恢复,如果datanode所在主机的时间不一致,容易导致恢复的点不一致。如果可以确定能恢复到同一个时间点,可以在命令中配置参数 --targettime。
例子:
[tom@host05 ~]$ barman recover cn1 20231225T115651 /data/recover/udbtx/barman/data/cn1 --target-time '2023-12-25 12:00:00'
Starting local restore for server cn1 using backup 20231225T115651
Destination directory: /data/recover/udbtx/barman/data/cn1
target_time is 2023-12-25 12:00:00
backup begin_time is 2023-12-25 11:56:51.944218+08:00
Doing PITR. Recovery target time: '2023-12-25 12:00:00'
Copying the base backup.
Copying required WAL segments.
Generating recovery.conf
Identify dangerous settings in destination directory.

IMPORTANT
These settings have been modified to prevent data losses
unvdb.conf line 875: archive_command = false
Your UnvdbTX server has been successfully prepared for recovery!
基于barrier点的恢复
集群版本中,想要各个节点能够恢复到一致的状态,建议使用UDBDT提供的barrier技术。
每个节点都恢复到同一个barrier点,才能真正实现全局一致时间点的恢复。
1、此功能需要在备份前,创建barrier,在coordinator上执行如下命令
create barrier '2023_12_25_18_33';
2、恢复的时候加上参数 --target-barrier=barrier_name
[tom@host05 ~]$ barman recover cn1 20231225T183636 /home/tom/udbtx/data/cn1_recoverdata --remote-ssh-command='ssh tom@192.168.0.211' --target-barrier='2023_12_25_18_33'
Starting remote restore for server cn1 using backup 20231225T183636
Destination directory: /home/tom/udbtx/data/cn1_recoverdata
Remote command: ssh tom@192.168.0.211
Doing PITR. Recovery target barrier: '2023_12_25_18_33'
Copying the base backup.
Copying required WAL segments.
Generating recovery configuration
Identify dangerous settings in destination directory.

IMPORTANT
These settings have been modified to prevent data losses
unvdbsvr.conf line 875: archive_command = false
Recovery completed (start time: 2023-12-25 18:42:02.407887+08:00, elapsed time: 2 seconds)
Your Udbtx server has been successfully prepared for recovery!
集群操作实例
下面以一个集群为例,介绍实际操作备份和恢复的主要步骤和命令,后面给出典型配置的脚本操作步骤: unvdb=# monitor all;nodename | nodetype | status | description | host | port | recovery | boot time | nodezone ———-+——————–+——–+————-+—————+——-+———-+——————————-+———- gc1 | gtmcoord master | t | running | 192.168.0.91 | 17655 | false | 2023-12-26 15:59:04.342425+08 | local gc2 | gtmcoord slave | t | running | 192.168.0.204 | 17655 | true | 2023-12-26 15:59:05.377868+08 | local cn2 | coordinator master | t | running | 192.168.0.91 | 17432 | false | 2023-12-26 15:59:06.431039+08 | local cn1 | coordinator master | t | running | 192.168.0.211 | 17432 | false | 2023-12-26 15:59:06.415072+08 | local dn2_1 | datanode master | t | running | 192.168.0.91 | 19432 | false | 2023-12-26 15:59:07.519164+08 | local dn3_1 | datanode master | t | running | 192.168.0.204 | 19433 | false | 2023-12-26 15:59:07.532988+08 | local dn1_1 | datanode master | t | running | 192.168.0.211 | 19431 | false | 2023-12-26 15:59:07.501625+08 | local dn1_2 | datanode slave | t | running | 192.168.0.91 | 19431 | true | 2023-12-26 15:59:08.609163+08 | local dn2_2 | datanode slave | t | running | 192.168.0.204 | 19432 | true | 2023-12-26 15:59:08.625373+08 | local dn3_2 | datanode slave | t | running | 192.168.0.211 | 19433 | true | 2023-12-26 15:59:08.652759+08 | local (10 rows)
备份前创建一个barrier,执行一次日志切换,然后备份:
create barrier '2023_12_26_19_00';

barman switch-wal --force --archive cn1
barman switch-wal --force --archive cn2
barman switch-wal --force --archive gc1
barman switch-wal --force --archive dn1_1
barman switch-wal --force --archive dn2_1
barman switch-wal --force --archive dn3_1

下面等同于barman backup all
barman backup cn1
barman backup cn2
barman backup gc1
barman backup dn1_1
barman backup dn2_1
barman backup dn3_1
当需要恢复数据的时候,查询备份列表,恢复数据
下面等同于barman list-backup all
barman list-backup cn1
barman list-backup cn2
barman list-backup gc1
barman list-backup dn1_1
barman list-backup dn2_1
barman list-backup dn3_1

barman recover cn1 backup_id  /home/tom/udbtx/data/cn1_recoverdata --remote-ssh-command='ssh tom@192.168.0.211' --target-barrier='2023_12_26_19_00'
barman recover cn2 backup_id  /home/tom/udbtx/data/cn2_recoverdata --remote-ssh-command='ssh tom@192.168.0.91' --target-barrier='2023_12_26_19_00'
barman recover gc1 backup_id  /home/tom/udbtx/data/gc1_recoverdata --remote-ssh-command='ssh tom@192.168.0.91' --target-barrier='2023_12_26_19_00'
barman recover dn1_1 backup_id  /home/tom/udbtx/data/dn1_1_recoverdata --remote-ssh-command='ssh tom@192.168.0.211' --target-barrier='2023_12_26_19_00'
barman recover dn2_1 backup_id  /home/tom/udbtx/data/dn2_1_recoverdata --remote-ssh-command='ssh tom@192.168.0.91' --target-barrier='2023_12_26_19_00'
barman recover dn3_1 backup_id  /home/tom/udbtx/data/dn3_1_recoverdata --remote-ssh-command='ssh tom@192.168.0.204' --target-barrier='2023_12_26_19_00'
完成恢复后,启动集群。
各个节点启动完成后,需要删除各个节点下面的recovery.signal文件后再启动服务。udbarman_operate_distrib.sh 脚本中也提供了在所有master节点执行删除recovery.signal的操作:sh udbarman_operate_distrib.sh delete_recovery_signal。
注意事项:
恢复后,原来的slave节点数据与master不一致,需要重新append slave节点。
如果集群运行过程中master节点发生过切换,则barman的配置文件需要重新生成,以便与集群最新的结构相对应。
以下脚本使用前,阅读barman 配置脚本章节,需要修改的地方根据实际情况修改。
基于rsync方式的备份操作步骤
1、备份前置条件,设置ud_hba.conf的机器之间的trust。 [tom@host05 ~]$ ./udbarman_operate_distrib.sh set_hba_trust
2、设置后在管理节点上使用list hba查看设置的结果,成功后重新启动节点服务。
3、此功能需要在备份前,创建barrier,在coordinator上执行如下命令
create barrier '2023_12_25_18_33';
或者执行如下命令: [tom@host05 ~]$ ./create_barrier.sh
4、生成barman配置 [tom@host05 ~]$ ./udbarman_operate_distrib.sh generate_config_rsync
5、执行设置归档命令,archive_mode为on,archive_command设置。 [tom@host05 ~]$ ./udbarman_operate_distrib.sh set_archive_cmd
6、设置归档命令后,需要重新启动节点服务。
7、执行执行强制日志切换。 [tom@host05 ~]$ barman switch-wal –force –archive all
8、检查备份之前的配置状态,应该均为OK。 [tom@host05 ~]$ barman check all
9、执行备份操作 [tom@host05 ~]$ barman backup all 或者执行如下命令: [tom@host05 ~]$ ./udbarman_operate_distrib.sh backup_all
基于unvdb方式的备份操作步骤
1、备份前置条件,设置ud_hba.conf的机器之间的trust。 [tom@host05 ~]$ ./udbarman_operate_distrib.sh set_hba_trust
2、设置后在管理节点上使用list hba查看设置的结果,成功后重新启动节点服务。
3、此功能需要在备份前,创建barrier,在coordinator上执行如下命令。
create barrier '2023_12_25_18_33';
或者执行如下命令: [tom@host05 ~]$ ./create_barrier.sh
4、生成barman配置。 [tom@host05 ~]$ ./udbarman_operate_distrib.sh generate_config_unvdb
5、执行设置归档命令,archive_mode为off。 [tom@host05 ~]$ ./udbarman_operate_distrib.sh set_archive_cmd
6、设置归档命令后,需要重新启动节点服务。
7、创建复制槽。 [tom@host05 ~]$ ./udbarman_operate_distrib.sh create_slot
8、启动接受wal进程。 [tom@host05 ~]$ ./udbarman_operate_distrib.sh receive_wal
9、执行执行强制日志切换。 [tom@host05 ~]$ barman switch-wal –force –archive all
10、检查备份之前的配置状态,应该均为OK。 [tom@host05 ~]$ barman check all
11、执行备份操作 [tom@host05 ~]$ barman backup all 或者执行如下命令: [tom@host05 ~]$ ./udbarman_operate_distrib.sh backup_all
基于rsync/unvdb方式的恢复操作步骤
1、查看所有节点的备份backupid。 [tom@host05 ~]$ barman list-backup all
2、恢复到远程节点,注意要配置之前已经创建的barrierid。 [tom@host05 ~]$ ./barman_operate_distrib.sh recover_remote
3、停止正在运行的节点。
4、替换恢复节点为实际运行节点。 [tom@host05 ~]$ ./udbarman_operate_distrib.sh switch_recover_data
5、启动节点服务。
6、将节点上的recovery.signal删除。 [tom@host05 ~]$ ./barman_operate_distrib.sh delete_recovery_signal
7、启动恢复后的节点服务。
数据库升级
管理节点升级
管理节点升级采用ud_upgrade工具,操作步骤如下:
备份数据 , 在升级之前,务必对数据库进行完整备份,以防止升级过程中出现数据丢失或损坏
ud_dumpall -U unvdb -f /path/to/backup/mgr_backup.sql
停止管理节点
ud_ctl stop -D /path/to/mgr/data
安装新版本
# 切换到新版本的二进制目录
export PATH=/path/to/new/mgr/bin:$PATH
# 初始化数据库
initmgr -D /path/to/mgr/data
升级数据目录
# 切换到新版本的二进制目录
export PATH=/path/to/new/mgr/bin:$PATH

# 运行 ud_upgrade
ud_upgrade -b /path/to/old/mgr/bin -B /path/to/new/mgr/bin \
           -d /path/to/old/data/directory -D /path/to/new/data/directory
启动管理节点 , 启动新的管理节点服务
ud_ctl start -D /path/to/new/mgr/data
集群升级
集群升级采用udb_tool工具完成Coordinator、GTM、Datanode所有节点的统一升级,按交互式提示完成操作步骤:
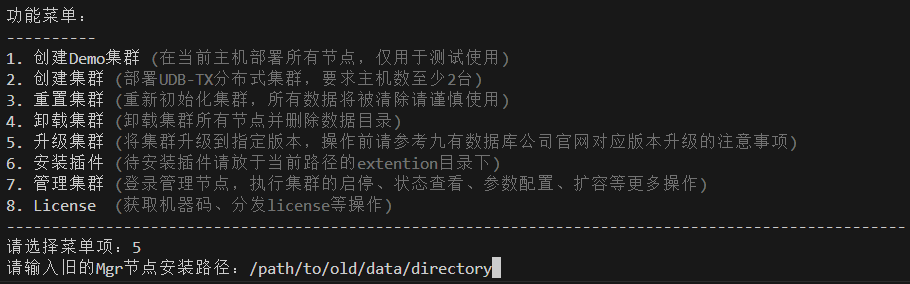
插件使用
FDW连接PostgreSQL
本小节介绍如何使用fdw跨库连接unvdb数据库。
创建extention
create extension unvdb_fdw;
创建完成后,可以在系统表中查询到相应的扩展
select * from pg_extension ;
select * from pg_foreign_data_wrapper;
创建外部数据封装服务器
该server作用是在本地配置一个连接远程的信息,option,例如创建一个server,名字为fdw_server1,options中是远程数据库所在的主机IP、端口、数据库名称。
create server fdw_server1 foreign data wrapper unvdb_fdw options (host'xx.xx.xxx.xxx', port'xxxx',dbname'xx');
通过以下系统表可以查看已经创建的 server。
select * from pg_foreign_server;
创建用户映射
for后面的unvdb是本地登录执行的用户名,option里存储的是远程的用户和密码;
create user MAPPING FOR xx1 server fdw_server1 options (user'xx2',password'xxx');
创建外部表
在本地创建一张foreign table,表结构和远程数据库中要操作的表一样,options中是远程数据库中表所在的schema和表名。
create foreign table test_foreign(id int , num int) server fdw_server1 options(schema_name'public',table_name'test');
附录
Udbmgr介绍
Udbmgr简介
Udbmgr 是针对UDBDT 集群的管理工具,具有管理UDBDT集群的所有功能,包括UDBDT集群的初始化,启动,停止;所有集群节点的参数设置;也包括UDBDT集群的扩缩容等功能。
Udbmgr 与UDBDT 集群之间的关系如下图所示:
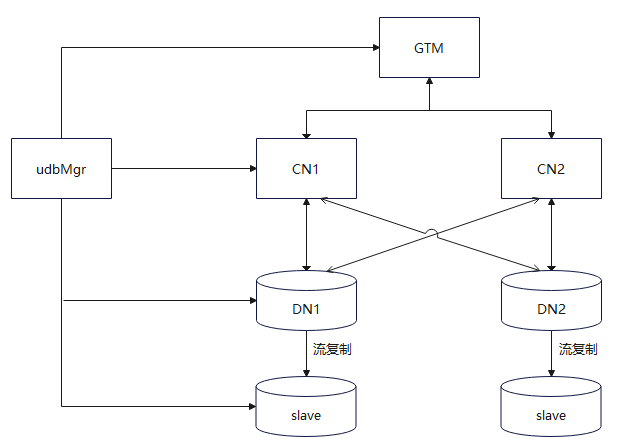
UDBDT集群部署可以在多台机器上,Udbmgr 为了实现管理UDBDT 集群的功能,需要在每台主机上启动一个叫agent的进程,Udbmgr 通过agent进程实现对UDBDT集群的管理。Udbmgr 包括对agent进程的管理.
比如,用户执行了一个 start 命令来启动host1主机上的某个集群节点,Udbmgr 就会把start命令传给host1主机上的agent进程,由agent进程执行start命令;然后agent把start命令的执行结果传给Udbmgr 并显示为用户命令的执行结果。所以,UDBDT集群所在的主机上都要启动一个agent进程。
为实现方便管理UDBDT 集群的目的,在Udbmgr中有4张表,用于存储UDBDT集群的基本配置,Udbmgr的所有操作命令都是针对这4张表进行操作的,所以有必要详细介绍这4张表。
host表
Host表用于存放部署UDBDT 集群的主机和agent进程等信息。如下图所示,是存放了2条主机信息的host表:
示例: 连接udbmgr执行:
unvdb=# list host;
输出结果罗列在下面的表格中:
| name | user | port | protocol | agentport | address | udbhome |
|---|---|---|---|---|---|---|
| host01 | tom | 22 | ssh | 19431 | 192.168.0.11 | /home/tom/app |
| host02 | tom | 22 | ssh | 19431 | 192.168.0.12 | /home/tom/app |
Host表每列的详细解释如下:
| 列名 | 描述 |
|---|---|
| name | 主机名,即address列的IP address对应的主机名。 |
| user | 用户名,部署UDBDT集群的用户名。 |
| port | Protocol列使用的协议的端口,ssh协议默认使用22端口。 |
| protocol | Udbmgr 与agent通信使用的协议。默认使用ssh协议。 |
| agentport | Agent进程使用的端口。这个需要由用户指定一个与其他进程不冲突的端口号。 |
| address | IP address,主机的ip 地址。 |
| udbhome | 部署UDBDT 集群的可执行文件(二进制文件)在主机上的存放路径。 |
使用add host命令可以往host表中添加一行;
使用alter host命令可以修改行中的字段;
使用drop host可以删除host表中的一行;
使用list host命令可以显示host表中指定的host的信息。
上述命令的详细使用请参考第四章中host表相关命令。
下面是对host表常用操作命令例子:
add host host01( user=tom, protocol=ssh, address='192.168.0.11', agentport=31001, udbhome='/home/tom/app');
alter host host01(udbhome='/opt/tom/app');
drop host host01;
list host;
node表
node 表用于保存部署UDBDT 集群中每个节点的信息,同时包括从节点与主节点之间的同/异步关系等。
下面是使用list node命令查看的node表中的数据: 示例: 连接udbmgr执行:
unvdb=# list node;
输出结果选取4条罗列在下面的表格中:
| name | host | type | mastername | port | sync_state | path | initialized | incluster | readonly |
|---|---|---|---|---|---|---|---|---|---|
| cn1 | host01 | coordinator master | 17432 | /home/tom/udbtx/data/cn1 | t | t | f | ||
| cn2 | host02 | coordinator master | 17432 | /home/tom/udbtx/data/cn2 | t | t | f | ||
| dn1_1 | host01 | datanode master | 19431 | /home/tom/udbtx/data/dn1_1 | t | t | f | ||
| gc1 | host01 | gtmcoord master | 17655 | /home/tom/udbtx/data/gc1 | t | t | f |
Node表中每列的解释如下:
| 列名 | 描述 |
|---|---|
| name | UDBDT 集群中节点的名字,比如cn2就是其中一个coordinator的名称。 |
| host | 节点所在的主机,比如cn2节点部署在host02主机上。 |
| type | 节点的类型,比如cn2就是UDBDT集群中其中一个coordinator。 |
| mastername | 主节点名字。本列只有从节点有效,对主节点无效 |
| port | 端口号。节点部署在主机上使用的端口号。 |
| sync_state | 同/异步关系。仅对从节点有效。值“sync”表示该从节点是同步从节点,“potential”表示该从节点是潜在同步节点,“async”表示该从节点是异步从节点。 |
| path | 节点在主机上存放数据文件的路径。 |
| initialized | 本节点是否已经初始化,“t”代表已经初始化,“f”代表没有初始化。 |
| incluster | 本节点是否在集群中,“t”代表本节点属于集群,“f”代表本节点不属于集群。 |
| readonly | 本节点是否是只读模式的,只针对coordinator类型的节点有效。“t”表示本节点为只读,“f”表示本节点为可读写。 |
下面是对node表常用操作命令例子(详细命令的使用方法参考第二章中node表相关命令):
-- 向node表添加UDBDT集群的节点信息:
add gtmcoord master gc1 (host=host01,port=17655,path='/home/tom/udbtx/data/gc1');
add gtmcoord slave gc2 for gc1 (host=host02,port=17655,path='/home/tom/udbtx/data/gc2');
add coordinator master cn1(host=host01, port=17432,path='/home/tom/udbtx/data/cn1');
add coordinator master cn2(host=host02, port=17432,path='/home/tom/udbtx/data/cn2');
add datanode master dn1_1 (host=host01, port=19431,path='/home/tom/udbtx/data/dn1_1');
add datanode slave dn1_2 for dn1_1 (host=host02, port=19431,path='/home/tom/udbtx/data/dn1_2');
add datanode slave dn1_3 for dn1_1 (host=host03, port=19431,path='/home/tom/udbtx/data/dn1_3');
add datanode master dn2_1(host=host02, port=19432,path='/home/tom/udbtx/data/dn2_1');
add datanode slave dn2_2 for dn2_1 (host=host01, port=19432,path='/home/tom/udbtx/data/dn2_2');
add datanode slave dn2_3 for dn2_1 (host=host03, port=19432,path='/home/tom/udbtx/data/dn2_3');
-- 修改node表中的某一列(在集群没有init以前可以随意修改node表中的值):
alter datanode slave dn1_2(port=24332);
alter datanode master dn1_1(port=18899);
-- 删除node表中的一行(在集群没有init以前可以随意添加和删除node表中的值):
drop datanode slave dn1_2;
drop datanode master dn1_1;
drop coordinator master cn1;
drop gtmcoord slave gc2;
-- 显示node表中所有节点信息:
list node;
param表
Param表用于存放UDBDT集群中所有节点的unvdbsvr.conf文件中变量的配置。所有在unvdbsvr.conf文件中的变量都可以在这张表中设置并reload指定的节点。
下面是通过list param命令查看param表中的数据: 示例: 连接udbmgr执行:
unvdb=# list param;
输出结果示例如下:
| nodename | nodetype | key | value |
|---|---|---|---|
| '*' | coordinator master | listen_addresses | '*' |
| '*' | coordinator master | max_connections | 800 |
| '*' | coordinator master | max_prepared_transactions | 800 |
| '*' | datanode master | max_connections | 1000 |
| ‘*’ | gtmcoord master | max_connections | 2000 |
param表每列的解释如下:
| 列名 | 描述 |
|---|---|
| nodename | UDBDT 集群节点名字,星号“*”代表所有nodetype节点配置相同的配置。 |
| nodetype | 节点类型。 |
| key | unvdbsvr.conf文件中变量名 |
| value | key对应的变量值。 |
对param表常用操作命令举例如下(命令的具体使用方法参考第二章param表相关命令):
-- 向param表中添加一行:
set gtmcoord all (max_connections=1200);
set gtmcoord master gc1(superuser_reserved_connections=15);
set gtmcoord slave gc2(superuser_reserved_connections=16);
set coordinator all(autovacuum_max_workers=5);
set coordinator cn1(autovacuum_max_workers=5);
set datanode all(default_statistics_target=100);
set datanode master dn1_1 (autovacuum_vacuum_cost_delay='30ms');
set datanode slave dn1_2 (autovacuum_vacuum_cost_delay='60ms');
set datanode slave dn1_3 (autovacuum_vacuum_cost_delay='90ms');
-- 把参数重新设置为默认值:
reset datanode master all ( max_connections);
-- 显示param表中所有数据:
list param;
hba表
hba表用于管理存放UDBDT集群中所有节点的ud_hba.conf文件中的配置项,当配置项被添加后,就会记录到此表中,用来标识。对于添加过的配置项,可以通过list hba命令显示。 hba表每列的解释如下:
| 列名 | 描述 |
|---|---|
| nodename | UDBDT 集群节点名字,星号“*”代表所有nodetype节点配置相同的配置。 |
| hbavalue | hba配置项的具体值。 |
对hba表常用操作命令举例如下(命令的具体使用方法参考第四章hba表相关命令):
--向hba表中添加coordinator的hba内容:
add hba coordinator all ("host all all 10.0.0.0 8 md5");
-- 向hba表中添加datanode的hba内容:
add hba datanode all ("host all all 10.0.0.0 8 trust");
--显示hba表中的内容:
list hba;
--删除hba表中的内容:
drop hba coordinator all ("host all all 10.0.0.0 8 trust");
数据库参数设置
集群版本
udbmgr 参数参考
数据库参数
cat  >> ${mgrdata}/unvdbsvr.conf << EOF
port = 16432
listen_addresses = '*'
log_directory = 'ud_log'
log_destination ='csvlog'
logging_collector = on
log_min_messages = error
max_wal_senders = 5
hot_standby = on
wal_level = replica
EOF
HBA参数
cat  >> ${mgrdata}/ud_hba.conf << EOF
host    replication     all        10.0.0.0/8                 trust
host    all             all          10.0.0.0/8               trust
EOF
其中的
10.0.0.0/8需要根据实际情况修改。
其他节点 参数参考
登录udbmgr执行,根据命令执行的提示,需要重启集群。
--coord:
--Modify according to actual situation/请用户根据主机环境信息,适当调整
SET COORDINATOR ALL (shared_buffers = '1GB' );
SET COORDINATOR ALL (maintenance_work_mem = '1024MB');
SET COORDINATOR ALL (work_mem = '128MB' );
SET COORDINATOR ALL (max_connections = 1000 );
SET COORDINATOR ALL (max_prepared_transactions = 1000 );
SET COORDINATOR ALL (max_parallel_workers = 10 );
SET COORDINATOR ALL (max_worker_processes = 10 );
SET COORDINATOR ALL (max_parallel_workers_per_gather = 10 );
----
SET COORDINATOR ALL (log_truncate_on_rotation = on);
SET COORDINATOR ALL (log_rotation_age = '7d');
SET COORDINATOR ALL (log_rotation_size = '200MB');
SET COORDINATOR ALL (log_min_messages = error );
SET COORDINATOR ALL (log_min_duration_statement = 50 );
SET COORDINATOR ALL (log_connections = on );
SET COORDINATOR ALL (log_disconnections = on);
SET COORDINATOR ALL (log_duration = off);
SET COORDINATOR ALL (log_statement = 'ddl' );
SET COORDINATOR ALL (log_checkpoints = on );
set COORDINATOR all (log_error_verbosity=verbose);
SET COORDINATOR ALL (unix_socket_permissions = '0700');
SET COORDINATOR ALL (listen_addresses = '*' );
SET COORDINATOR ALL (superuser_reserved_connections = 13);
SET COORDINATOR ALL (tcp_keepalives_idle = 180);
SET COORDINATOR ALL (tcp_keepalives_interval = 10 );
SET COORDINATOR ALL (tcp_keepalives_count = 3 );
SET COORDINATOR ALL (track_activity_query_size = 2048 );
SET COORDINATOR ALL (max_locks_per_transaction = 128);
SET COORDINATOR ALL (constraint_exclusion = on);
SET COORDINATOR ALL (wal_level='replica');
SET COORDINATOR ALL (max_wal_senders = 3);
SET COORDINATOR ALL (autovacuum_max_workers = 5 );
SET COORDINATOR ALL (autovacuum_naptime = '60min');
SET COORDINATOR ALL (autovacuum_vacuum_threshold = 500);
SET COORDINATOR ALL (autovacuum_analyze_threshold = 500 );
SET COORDINATOR ALL (autovacuum_vacuum_scale_factor = 0.5 );
SET COORDINATOR ALL (lock_timeout = '180s');
SET COORDINATOR ALL (wal_sync_method = open_datasync);
SET COORDINATOR ALL (full_page_writes = off );
SET COORDINATOR ALL (commit_delay = 10);
SET COORDINATOR ALL (commit_siblings = 10 );
SET COORDINATOR ALL (checkpoint_timeout = '15min');
SET COORDINATOR ALL (checkpoint_completion_target=0.9 );
SET COORDINATOR ALL (max_wal_size = 10240);
SET COORDINATOR ALL (archive_mode = on);
SET COORDINATOR ALL (archive_command = '/bin/date');
SET COORDINATOR ALL (bgwriter_delay = '10ms');
SET COORDINATOR ALL (bgwriter_lru_maxpages = 1000 );
SET COORDINATOR ALL (bgwriter_lru_multiplier = 10.0 );
SET COORDINATOR ALL (pool_time_out = 300);
SET COORDINATOR ALL (enable_pushdown_art = on );
SET COORDINATOR ALL (enable_batch_hash = on);
SET COORDINATOR ALL (enable_batch_sort = on );
SET COORDINATOR ALL (enable_fast_query_shipping = off );
SET COORDINATOR ALL (uddt_enable_remote_query = off );

--datanode:
--Modify according to actual situation/请用户根据主机环境信息,适当调整
SET DATANODE ALL (shared_buffers = '1GB' );
SET DATANODE ALL (maintenance_work_mem = '1024MB');
SET DATANODE ALL (work_mem = '128MB' );
SET DATANODE ALL (max_connections = 3000 );
SET DATANODE ALL (max_prepared_transactions = 3000 );
SET DATANODE ALL (wal_keep_segments = 128 );
SET DATANODE ALL (effective_cache_size = '15GB' );
SET DATANODE ALL (max_parallel_workers = 10 );
SET DATANODE ALL (max_parallel_workers_per_gather = 10 );
----
SET DATANODE ALL (log_truncate_on_rotation = on);
SET DATANODE ALL (log_rotation_age = '7d' );
SET DATANODE ALL (log_rotation_size = '200MB' );
SET DATANODE ALL (log_min_messages = error);
SET DATANODE ALL (log_min_error_statement = error );
SET DATANODE ALL (log_duration = off);
SET DATANODE ALL (log_statement = 'ddl' );
set DATANODE all (log_error_verbosity=verbose);
SET DATANODE ALL (unix_socket_permissions =0700 );
SET DATANODE ALL (listen_addresses = '*');
SET DATANODE ALL (superuser_reserved_connections = 13 );
SET DATANODE ALL (track_activity_query_size = 2048);
SET DATANODE ALL (max_locks_per_transaction = 64);
set DATANODE ALL (wal_level='replica');
SET DATANODE ALL (max_wal_senders = 5 );
set DATANODE all (wal_log_hints = on);
SET DATANODE ALL (autovacuum = on );
SET DATANODE ALL (autovacuum_max_workers = 5);
SET DATANODE ALL (autovacuum_naptime = '60min' );
SET DATANODE ALL (autovacuum_vacuum_threshold = 500 );
SET DATANODE ALL (autovacuum_analyze_threshold = 500);
SET DATANODE ALL (autovacuum_vacuum_scale_factor = 0.1);
SET DATANODE ALL (autovacuum_vacuum_cost_delay = '30ms' );
SET DATANODE ALL (statement_timeout = 0 );
SET DATANODE ALL (lock_timeout = '180s' );
SET DATANODE ALL (wal_sync_method = open_datasync );
SET DATANODE ALL (wal_writer_delay = '200ms');
SET DATANODE ALL (commit_delay = 10 );
SET DATANODE ALL (commit_siblings = 10);
SET DATANODE ALL (checkpoint_timeout = '15min' );
SET DATANODE ALL (checkpoint_completion_target = 0.9);
SET DATANODE ALL (max_wal_size = 10240);
SET DATANODE ALL (archive_mode = on );
SET DATANODE ALL (archive_command = '/bin/date' );
SET DATANODE ALL (max_prepared_transactions = 4800);
SET DATANODE ALL (bgwriter_delay = '10ms' );
SET DATANODE ALL (bgwriter_lru_maxpages = 1000);
SET DATANODE ALL (bgwriter_lru_multiplier = 10.0);
SET DATANODE ALL (rep_max_avail_flag = on );
SET DATANODE ALL (enable_batch_hash = on);
SET DATANODE ALL (enable_batch_sort = on );

--gtmcoord:
SET GTMCOORD ALL (shared_buffers = '1GB' );
SET GTMCOORD ALL(max_connections = 3000);
SET GTMCOORD ALL(max_prepared_transactions = 3000);
set GTMCOORD ALL (wal_level='replica');
SET GTMCOORD ALL (max_wal_senders = 5 );
SET GTMCOORD ALL (enable_batch_hash = on);
SET GTMCOORD ALL (enable_batch_sort = on );
SET GTMCOORD ALL (enable_fast_query_shipping = off );
SET GTMCOORD ALL (uddt_enable_remote_query = off );
set GTMCOORD all (log_error_verbosity=verbose);